

CH9_Jaw Installation and Operation_Fanuc Turning
today
2024-10-25
local_offer
Fanuc Turning
visibility
1208
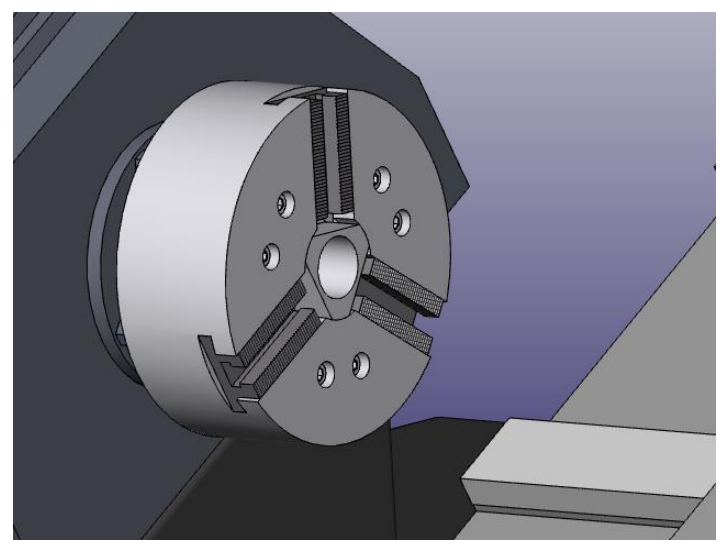
9. Jaw Installation and Operation
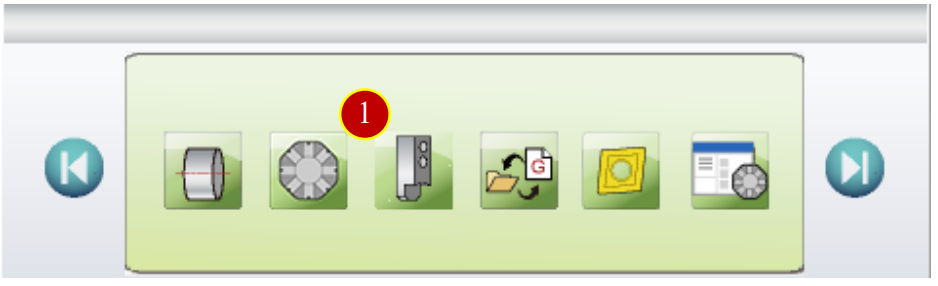
Click【Jaw Install】button to execute soft jaws cutting movement
9.1 Uninstall Jaw
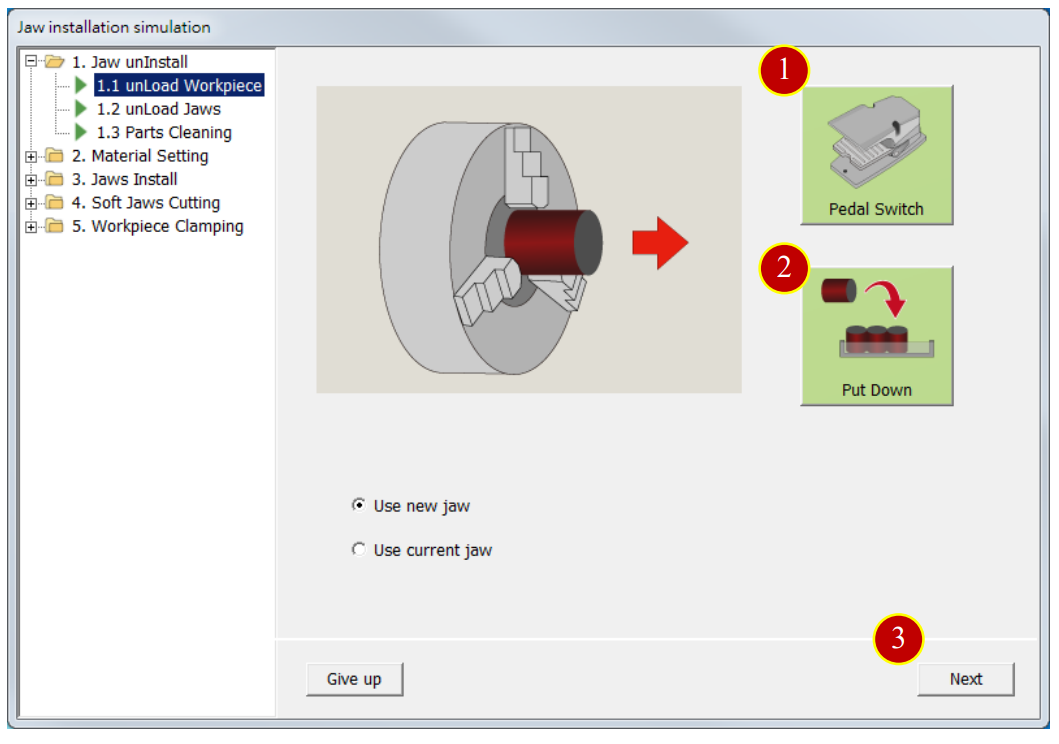
9.1.1 Unload Workpiece
(1) Click【Pedal Switch】to open the jaw
(2) Click【Put Down】to put down the workpiece
(3) Click【Next】
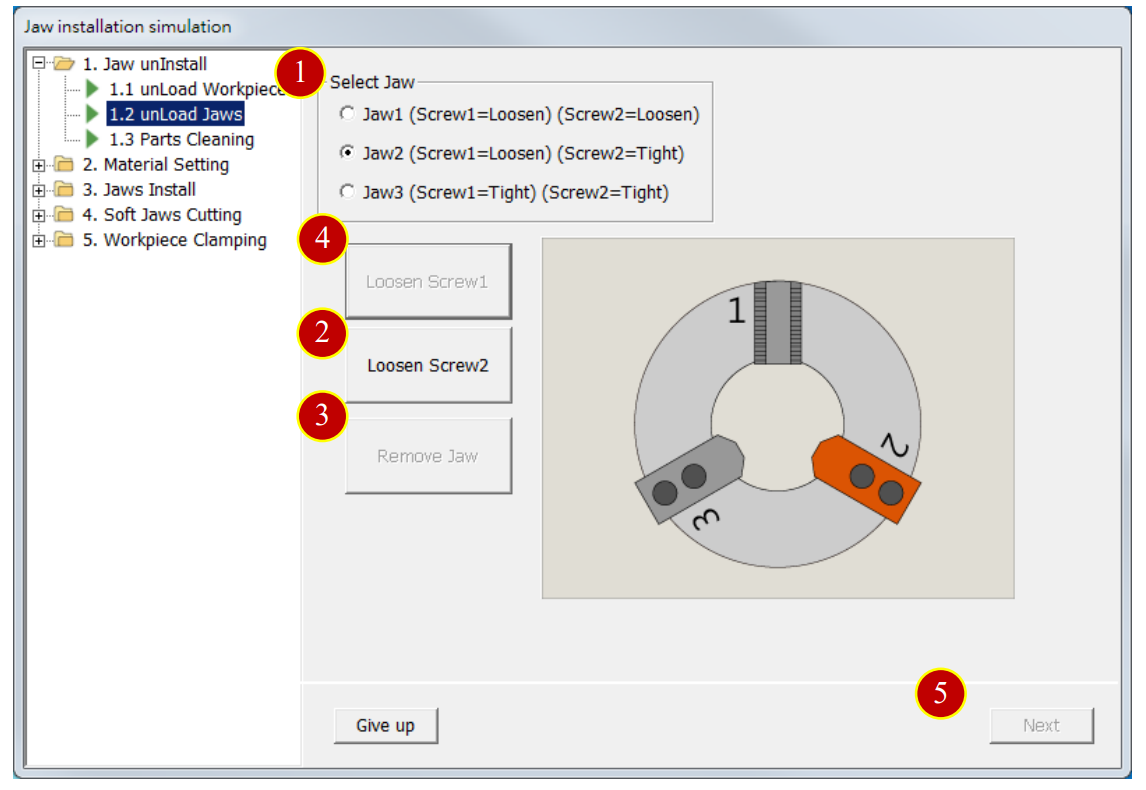
9.1.2 Unload Jaws
(1) Select【Jaw1】
(2) Click【Loosen Screw 1】and【Loosen Screw 2】
(3) Click【Remove Jaws】
(4) Select【Jaw 2】and【Jaw 3】, loosen screw 1 and screw 2 to unload jaw
(5) Click【Next】after removing all jaws
9.1.3 Parts Cleaning
(1) Click【Parts Cleaning】to clean the chips of parts
(2) Click【Next】to enter material setting operation

9.2 Material Setting
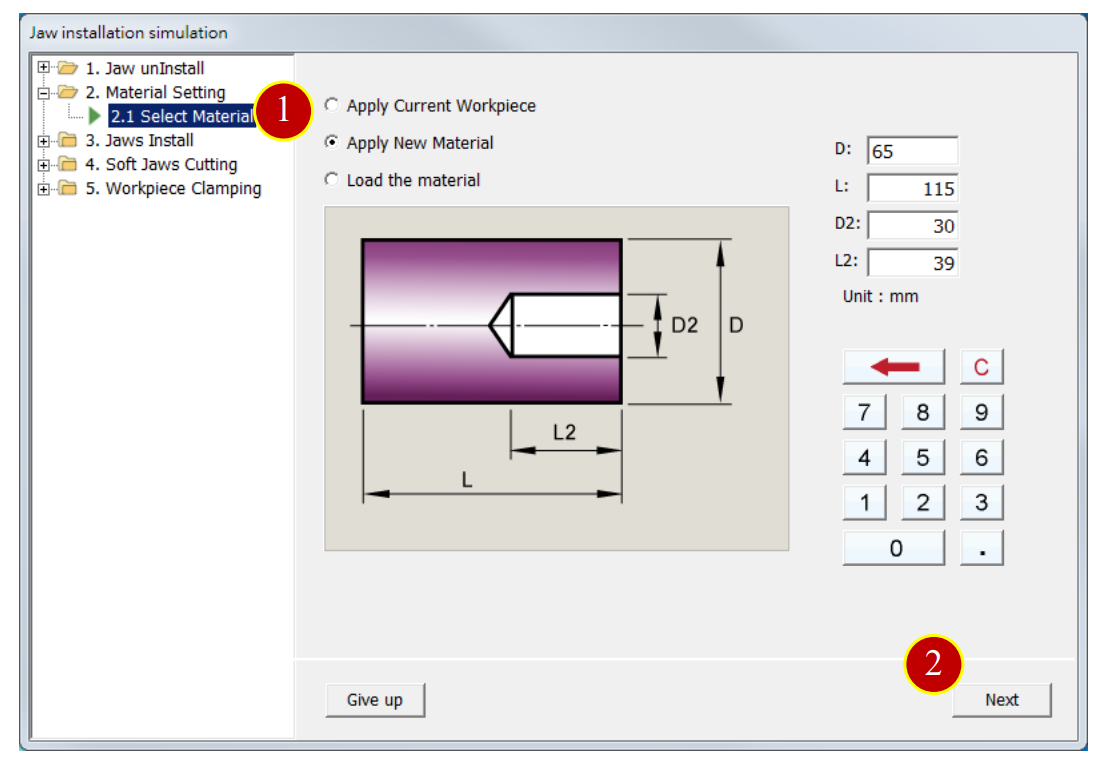
9.2.1 Select Material
(1) Choose the material to be clamped
e.g. Select【Apply New Material】
Diameter(D)=65.0, Length(L)= 115.0, Hole (D2)=30.0, (L2)=39.0
(2) Click【Next】to enter jaws installation operation
9.3 Jaw Install
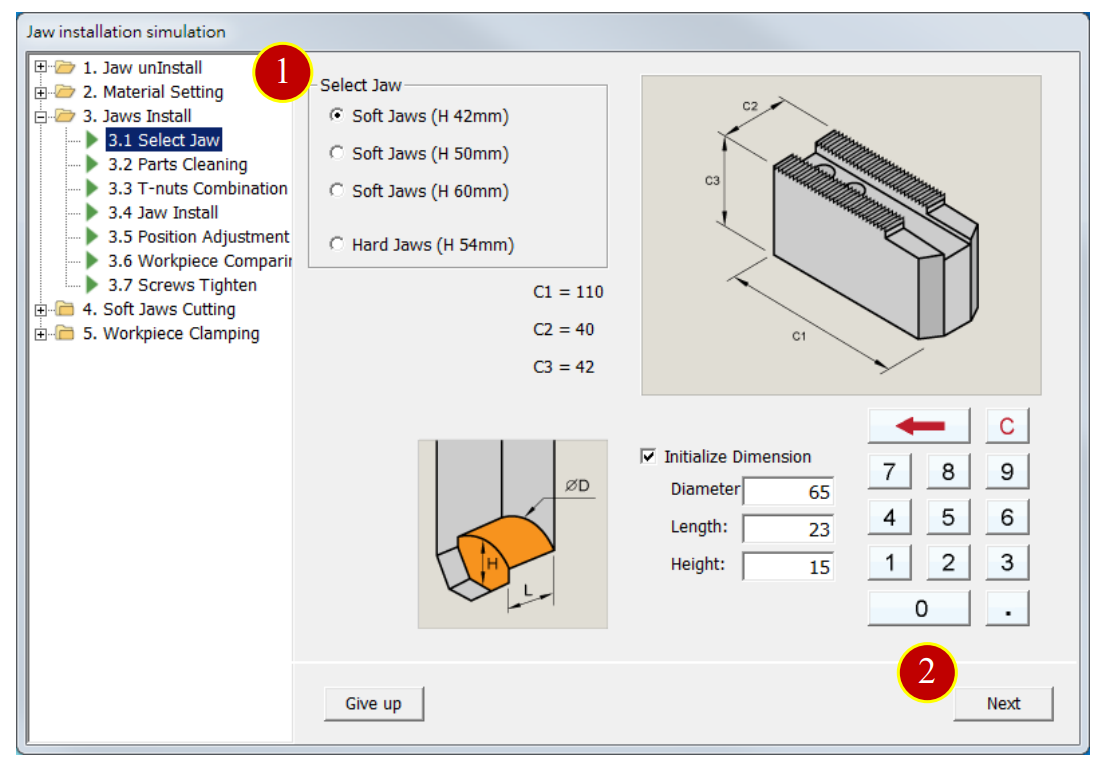
9.3.1 Select Jaws
(1) Select Jaw
e.g. Select【Soft Jaws (Height:42mm)】
(2) Click【Next】
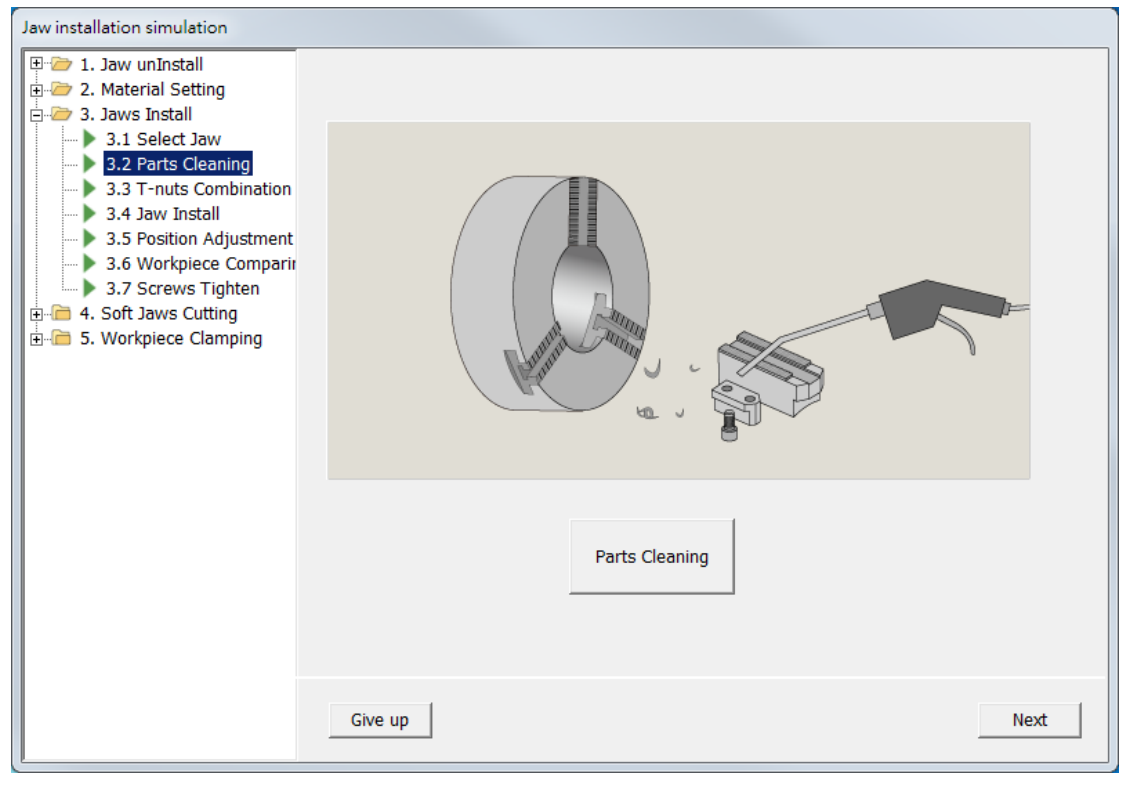
9.3.2 Parts Cleaning
(1) Click【Parts Cleaning】to clean the chips of parts
(2) Click【Next】
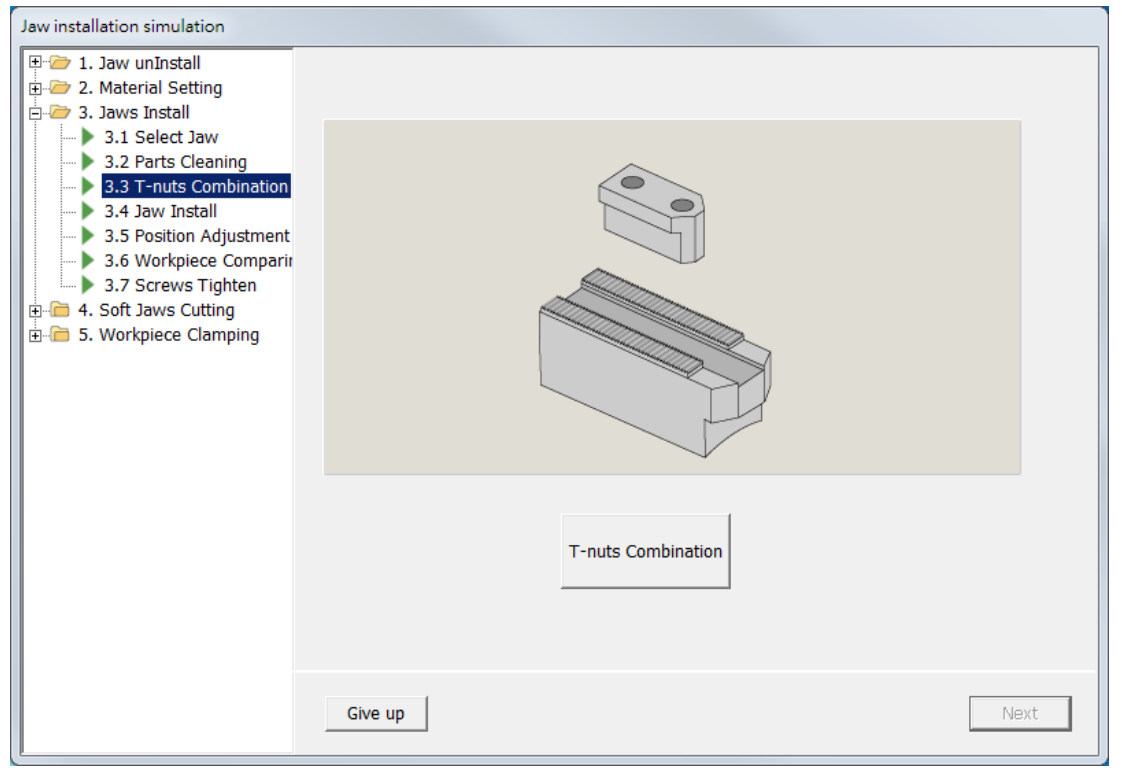
9.3.3 T-nuts Combination
(1) Click【T-nuts Combination】to combine the jaw parts
(2) Click【Next】
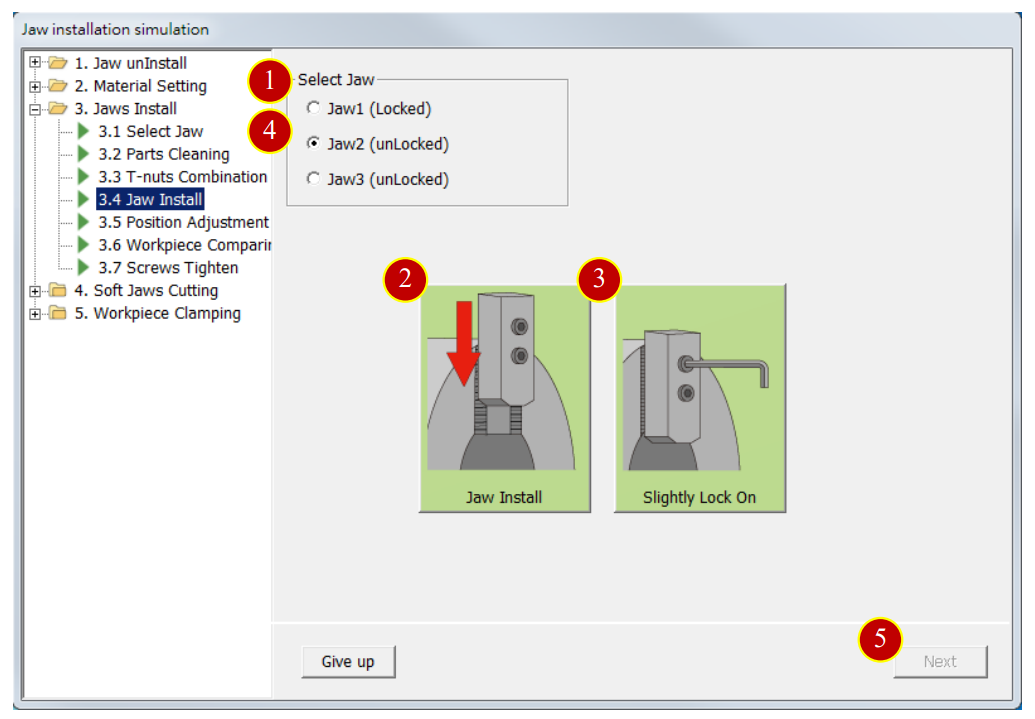
9.3.4 Jaw Install
(1) Select【Jaw 1】
(2) Click【Jaw Install】to install jaw 1
(3) Click【Slightly Lock On】to lock on the jaw 1 slightly
(4) Select【Jaw2】and【Jaw 3】to lock on them slightly
(5) Click【Next】after installing all jaws
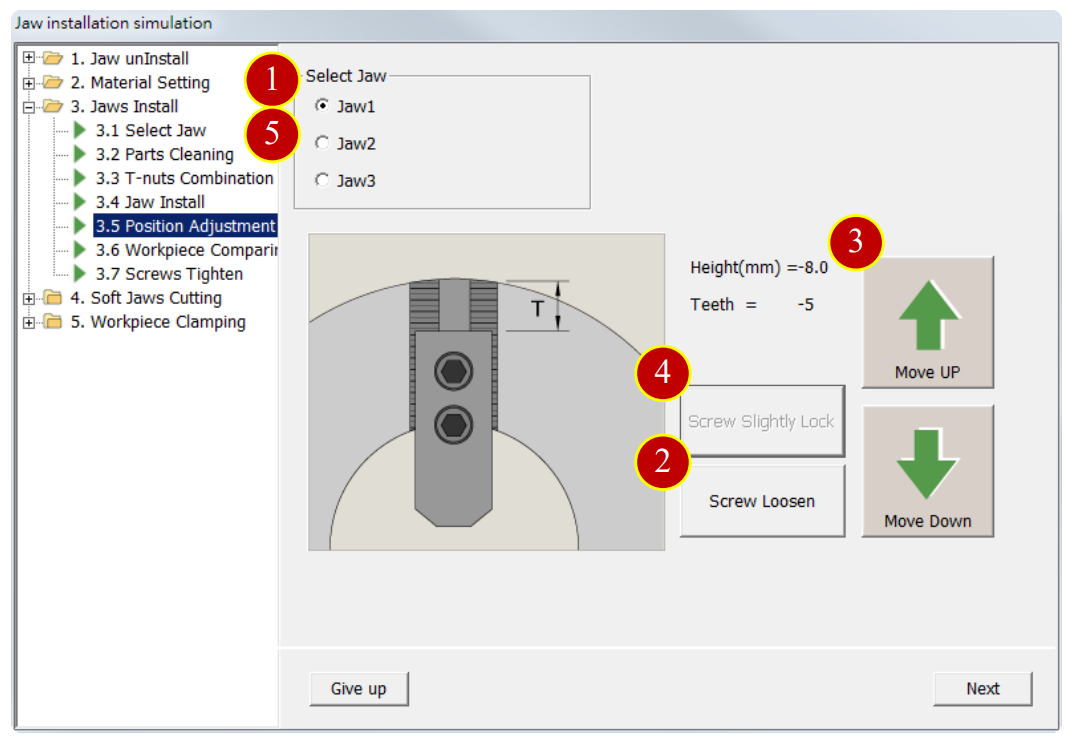
9.3.5 Position Adjustment
(1) Select【Jaw 1】
(2) Click【Screw Loosen】to loose the screw of jaw 1
(3) Click【Move Up】【Move Down】to adjust the height of jaw
e.g. Adjust the height to “-8.0”
(4) Click【Screw slightly Lock】to lock on the screw slightly
(5) Select【Jaw 2】【Jaw 3】to adjust the position of jaw2 and jaw3,
to make them identical to the height of jaw 1
(6) Click【Next】
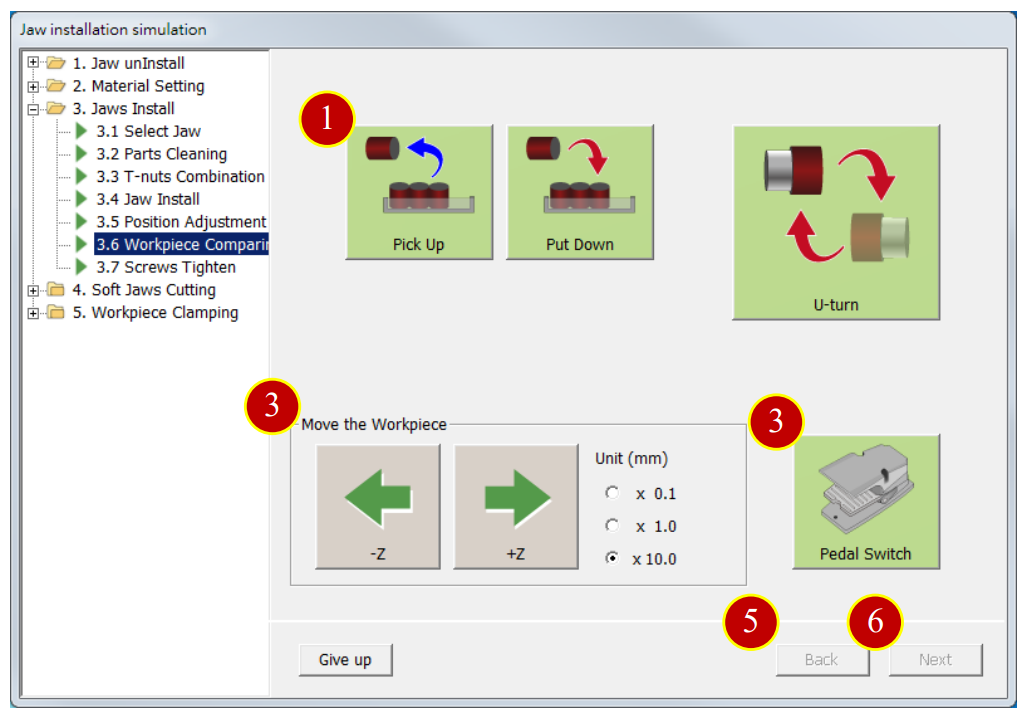
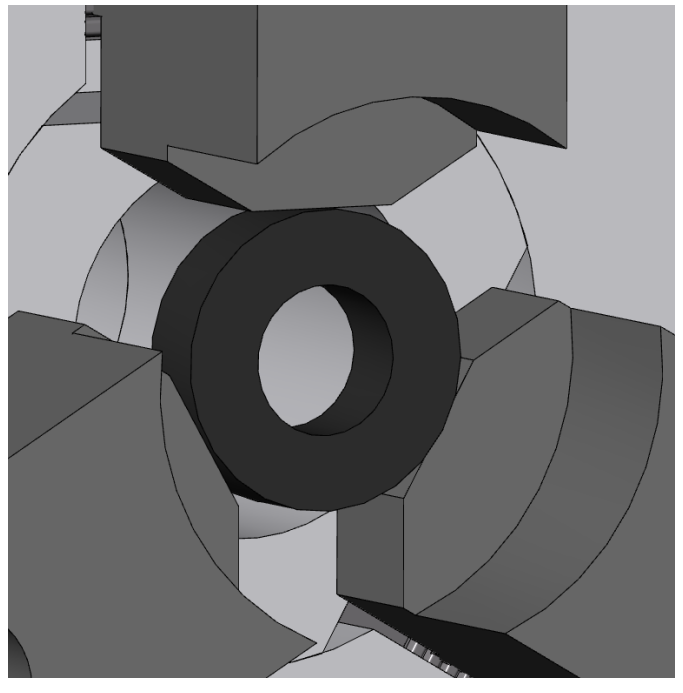
9.3.6 Soft Jaw Position and Size Comparison
(1) Make sure the soft jaws can clamp the material during clamping movement
(Travel Path=8mm)
(2) Click【Pick up】
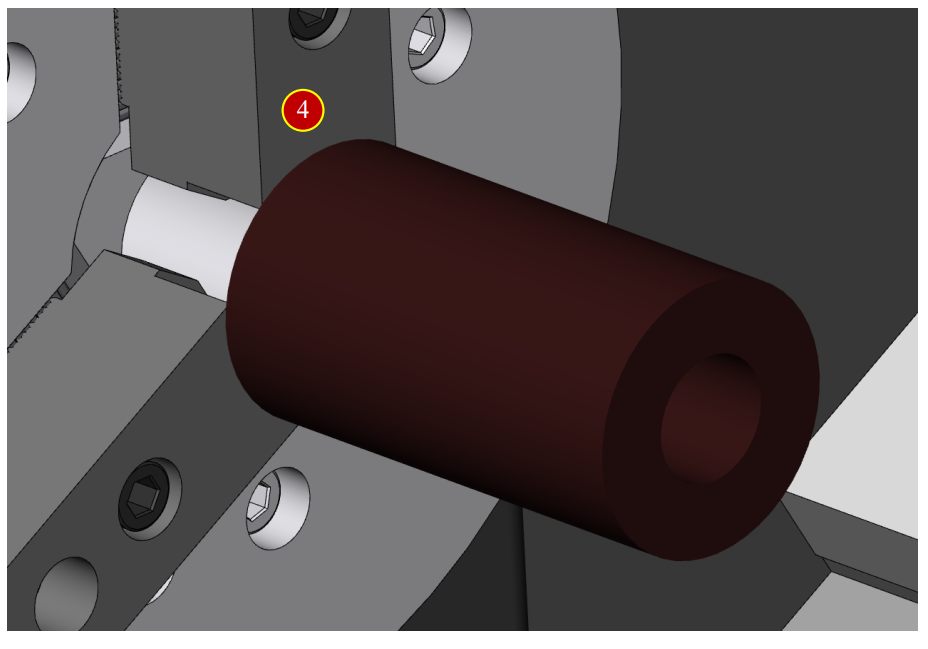
(3) When the soft jaw is open, make sure the workpiece can fit in it
(a) Click【Pedal Switch】to open the soft jaw
(b) Click【-Z】to move the workpiece above the soft jaws
and make sure the workpiece can fit in
(c) Click【+Z】to move the workpiece away from the soft jaws
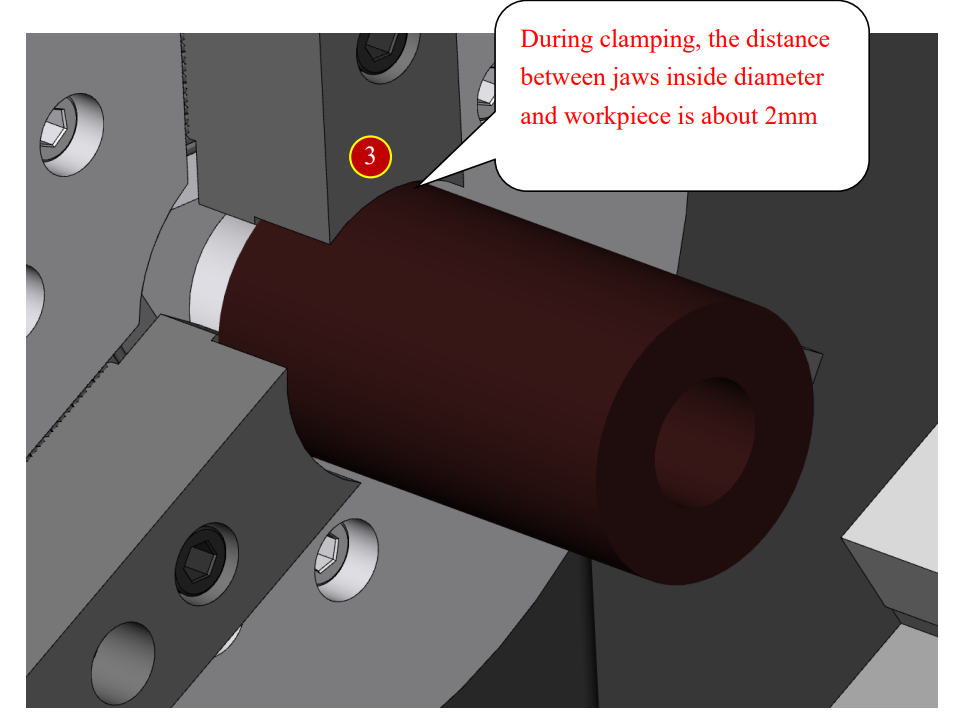
(4) When the soft jaws is clamping, make sure the workpiece can not fit in the soft jaws
(a) When the soft jaws is clamping, the workpiece can not being inside of the soft jaw. Make sure the workpiece is away from it
(b) Click【Pedal Switch】to clamping the soft jaw
(c) Click【-Z】to move the workpiece above the soft jaws
Make sure the workpiece can not fit in
(5) The recommend distance between jaws inside diameter and workpiece during the activity is about 2mm, it is easier for setting and remove the material
(6) Click【Put Down】to put down the workpiece
(7) Click【Next】to execute the soft jaws cutting
(a) When the soft jaws is not match with the workpiece dimension,
click【Back】to readjust the soft jaws position
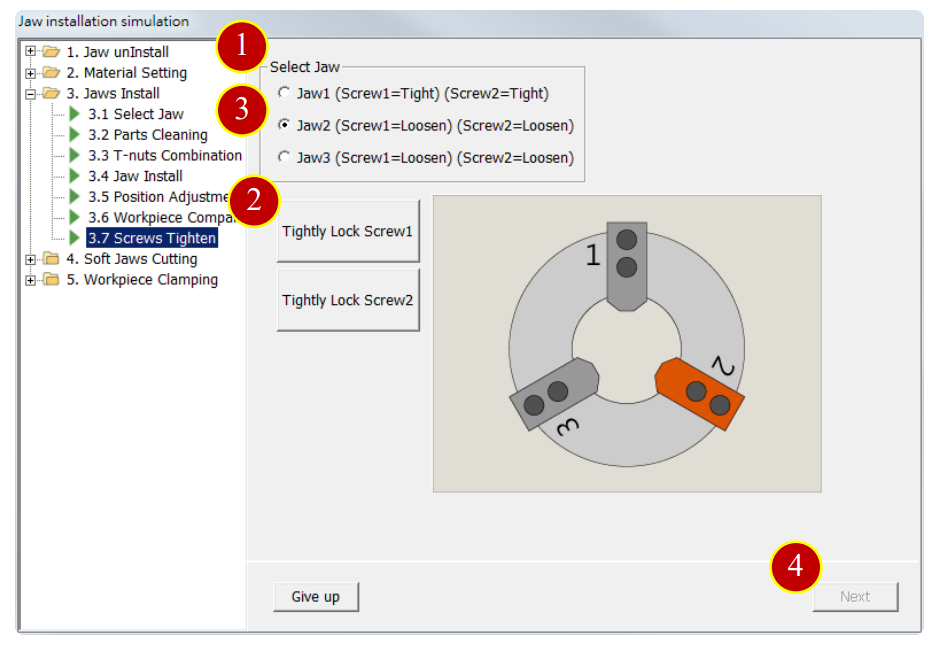
9.3.7 Screws Tighten
(1) Select【Jaw 1】
(2) Click【Tightly Lock Screw1】【Tightly Lock Screw 2】to finish jaw 1 installation
(3) Select【Jaw 2】【Jaw 3】to lock the screw1 and screw2 tightly
(4) Click【Next】to enter next step after tightly lock all of jaws
9.4 Soft Jaw Modify
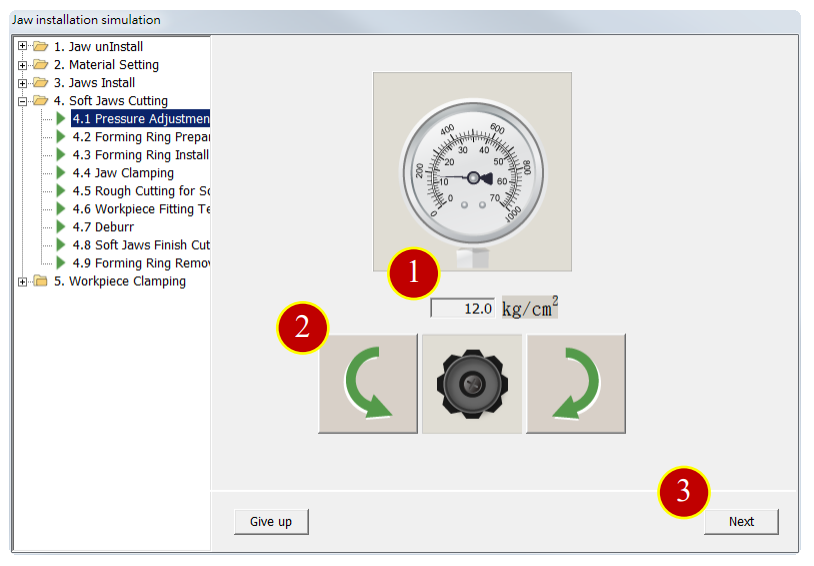
9.4.1 Pressure Adjustment
(1) When modifying soft jaws, the pressure adjustment value is between 8-13 kg/cm2
(2) Click【Pressure Adjustment】button to adjust the pressure e.g. 12.0kg/ cm2
Click left rotation button to decrease pressure,
click right rotation to increase pressure
(3) Click【Next】
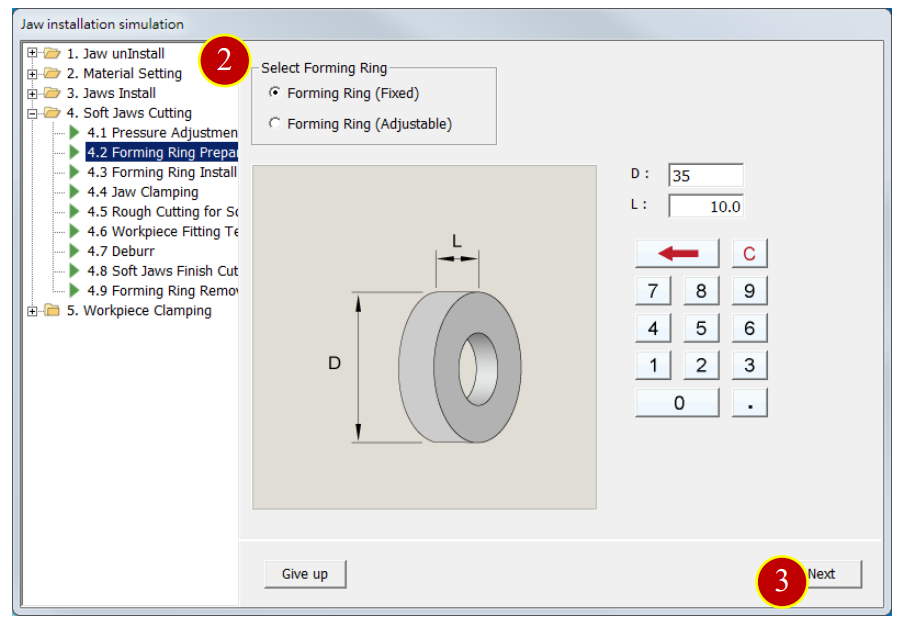
9.4.2 Forming Ring Prepare
(1) Select forming ring
e.g. Select【Forming Ring (Fixed)】 D:35.0 L:10.0
(2) Click【Next】
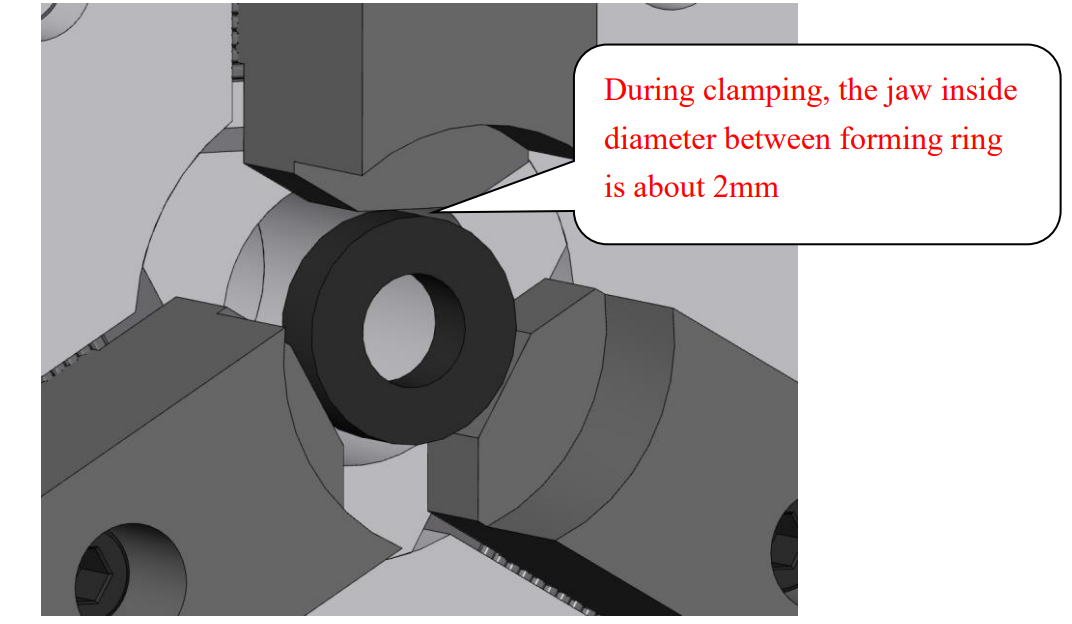
9.4.3 Forming Ring Install
Take forming ring as the soft ring clamping position. Forming Ring can divided into fixed and adjustable type
The recommend distance between jaws and forming ring during the activity
is about 2mm, it is easier for setting and remove the material
(1) Click【-Z】【+Z】to move forming ring above the soft jaws
(2) Click【Next】

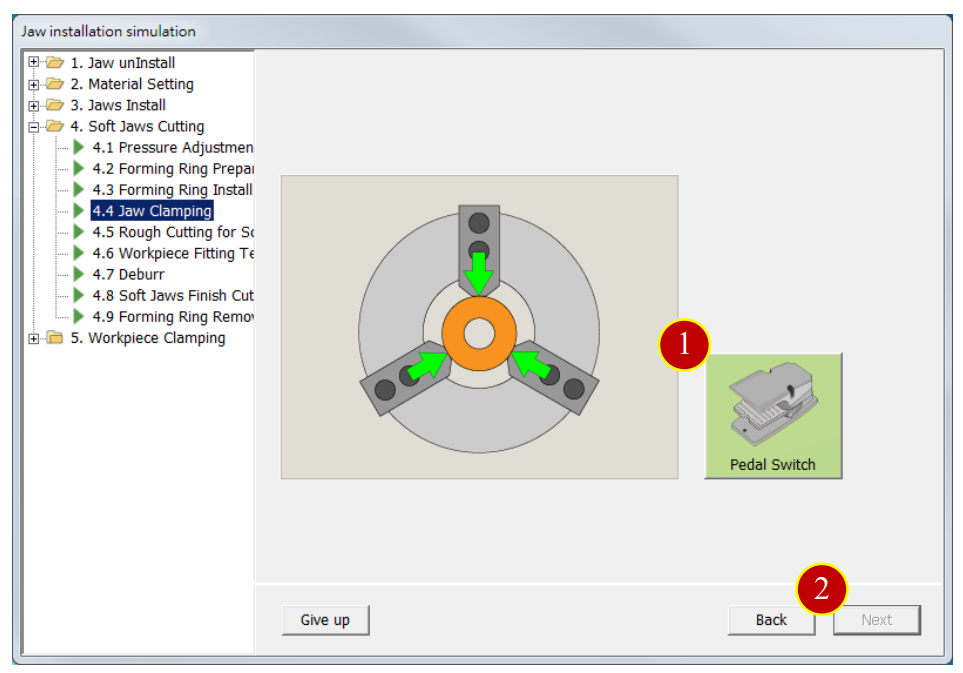
9.4.4 Hydraulic Clamping
(1) Click【Pedal Switch】to clamp the forming ring
(2) Click【Next】after finish clamping
(a) When the soft jaw dimension is not match with the forming ring, click【Back】to change forming ring dimension
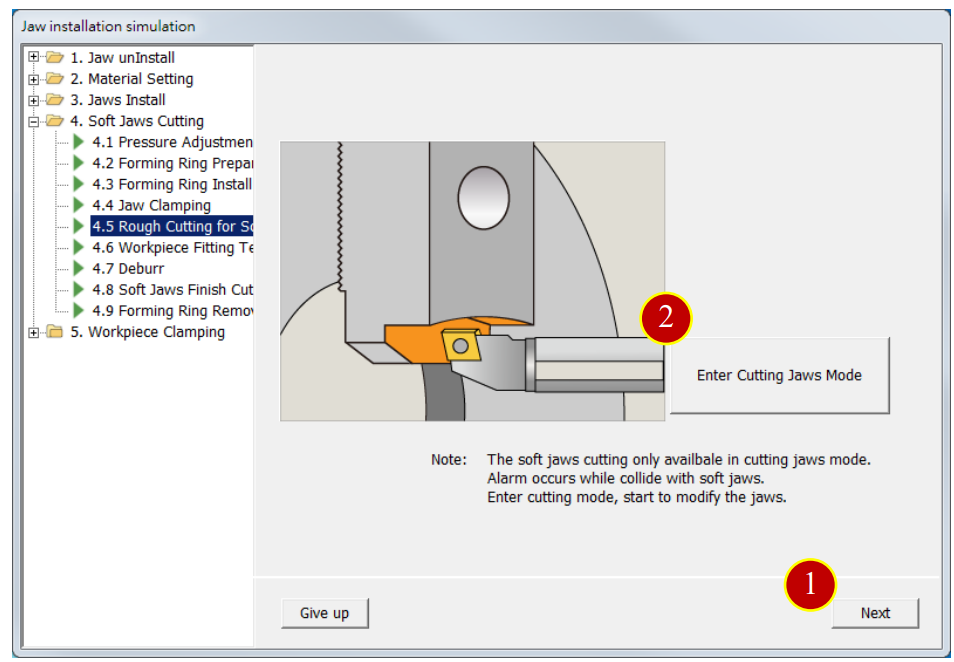
9.4.5 Rough Cutting for Soft Jaw
(1) The forming soft jaw doesn’t need to be cut, click【Next】to execute next steps
(2) If need to rough cut the jaws, click【Enter Cutting Jaws Mode】
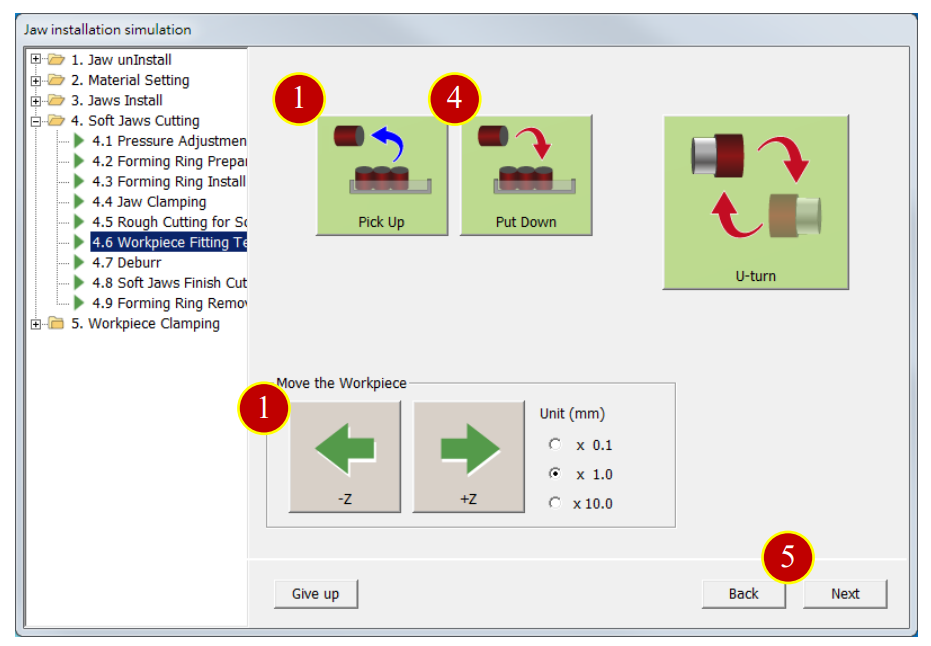
9.4.6 Workpiece Fitting Test
(1) Click【Pick Up】
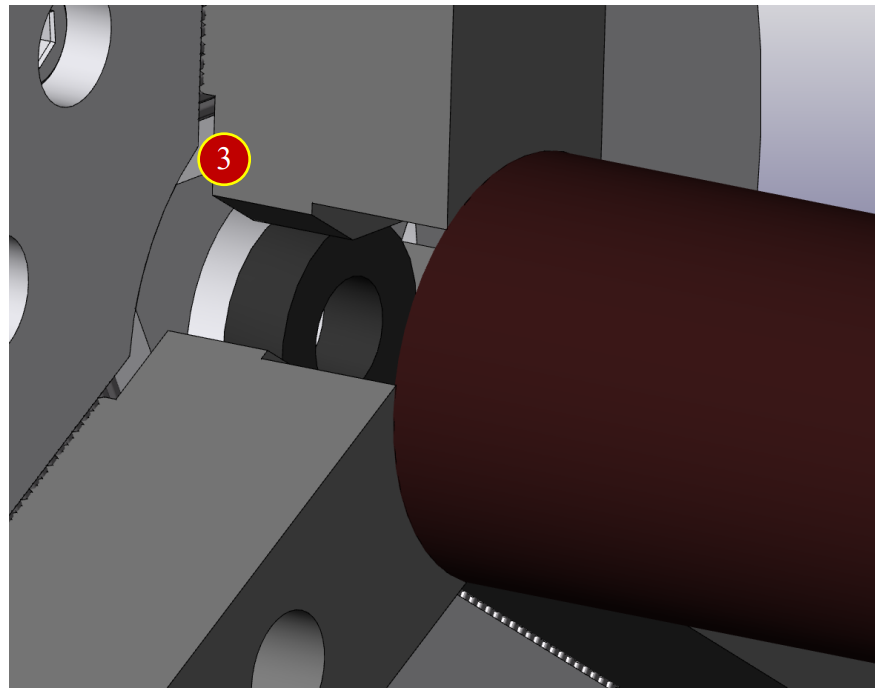
(2) Click【-Z】to move the workpiece above soft jaw to compare
(3) Make sure the soft jaw clamping position is identical to workpiece dimension
e.g. The workpiece dimension is about 1mm below larger than soft jaw
(4) Click【Put Down】to put down the workpiece
(5) Click【Click】
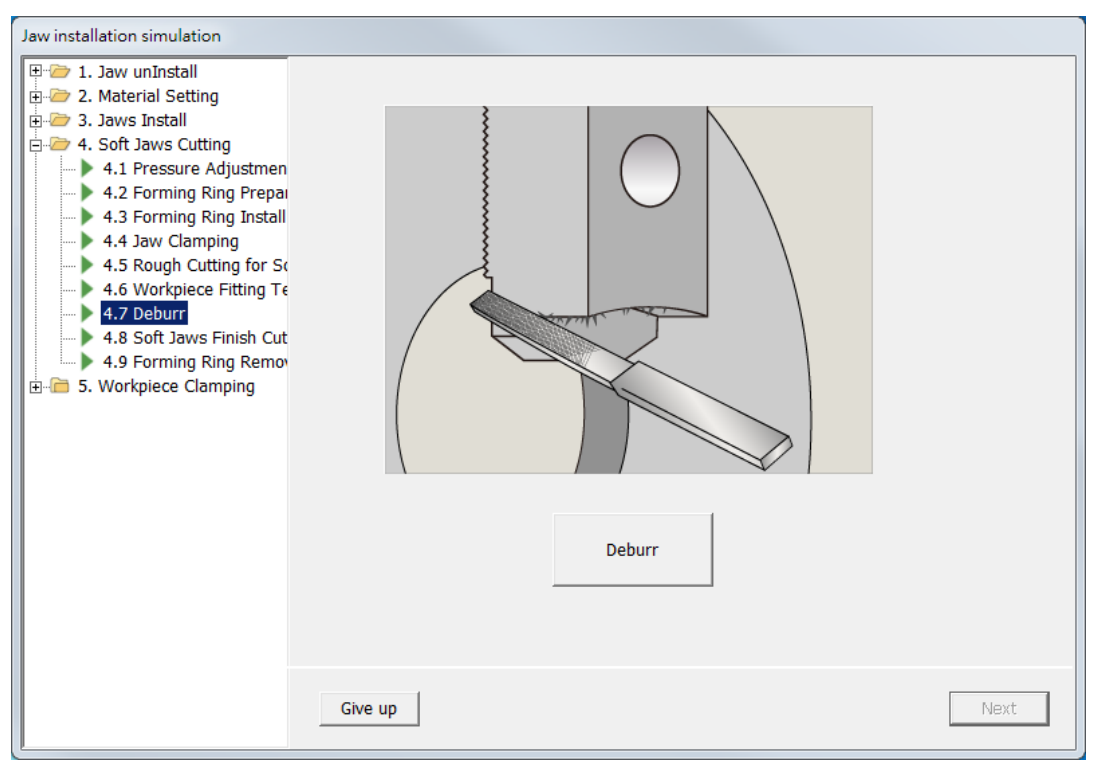
9.4.7 Deburr
(1) Click【Deburr】
(2) Click【Next】
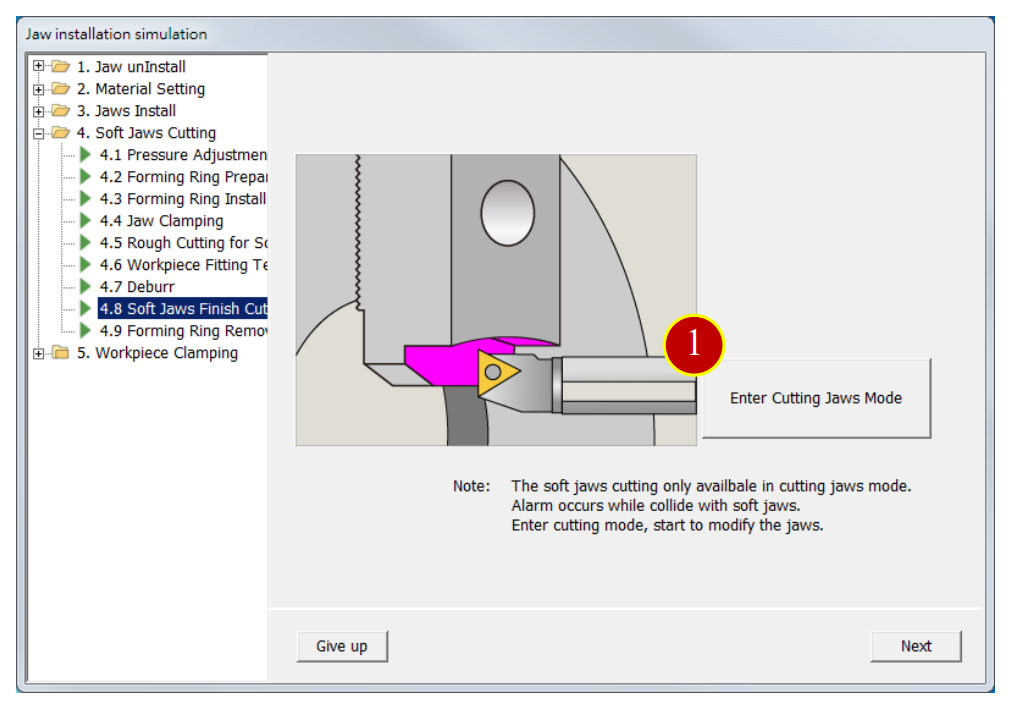
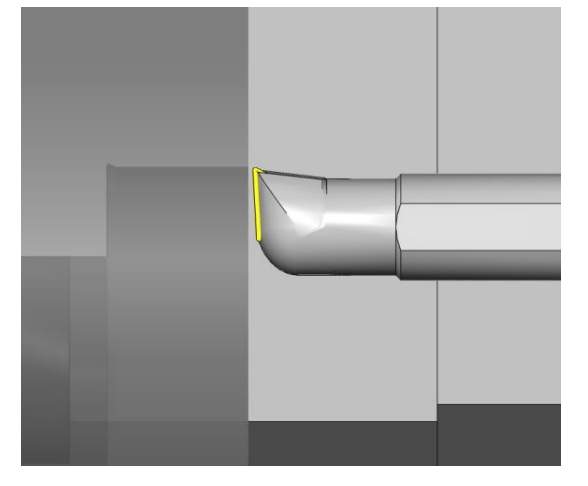
9.4.8 Soft Jaw Finish Cut- Preparation before Cutting
The needed tool for cutting soft jaw is inside diameter cutting tool e.g. No.7
(Tool Nose Radius R=0.4)
(1) Click【Enter Cutting Jaws Mode】
(2) Switch to RAPID mode
(3) Before manual operation, switch【Rapid Override】to 50% (or 25%),
can not be at 100%
(4) Press【INDEX】to switch to No.7 tool
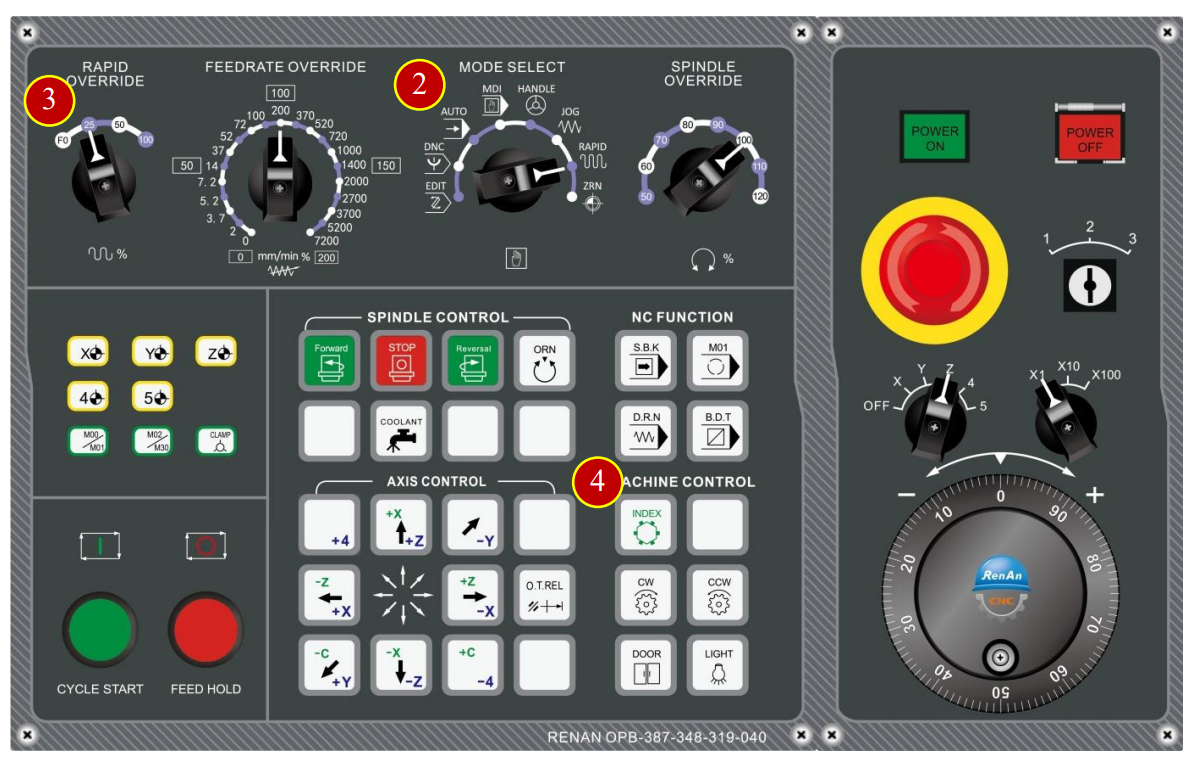
(5) Press Axial Control Button to move the tool rapidly
to about 50mm apart from the soft jaw

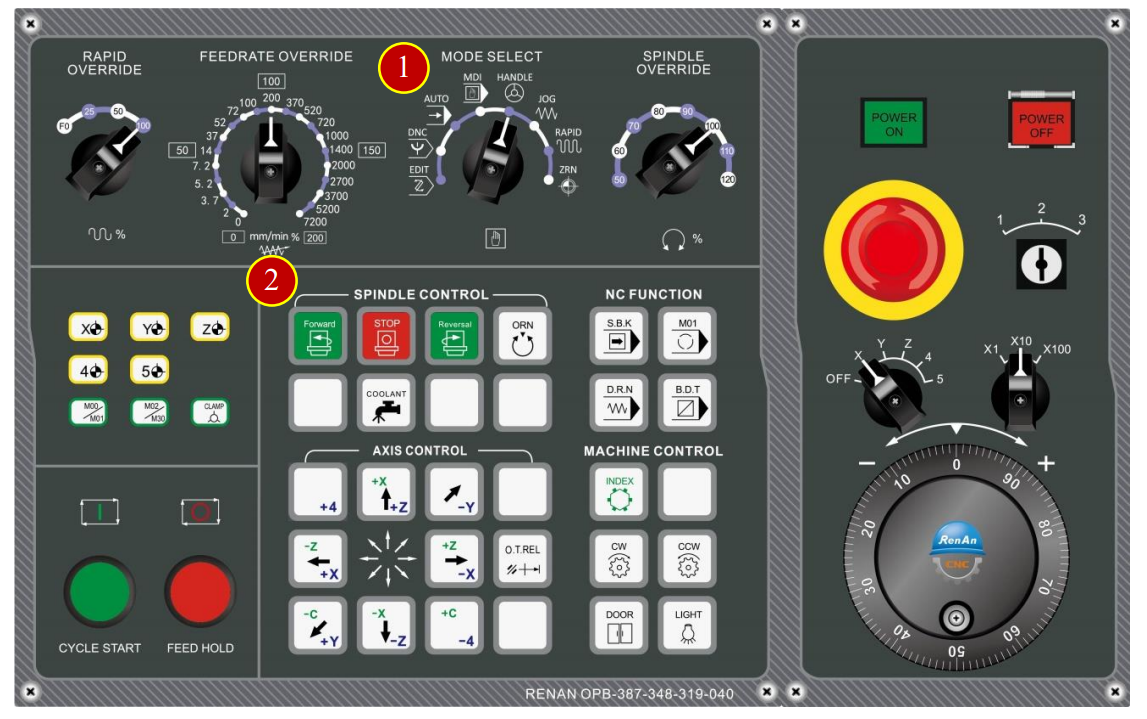
9.4.9 Soft Jaw Finish Cut- Cutting
(1) Switch to【HANDLE】mode
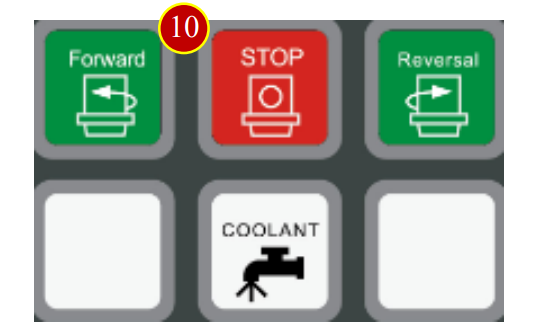
(2) Press【Forward】to rotate spindle forward
(3) Press【POS】to check machine coordinate

(4) Rotate Handwheel to cut soft jaw inside diameter by manual for about 0.1mm deeper
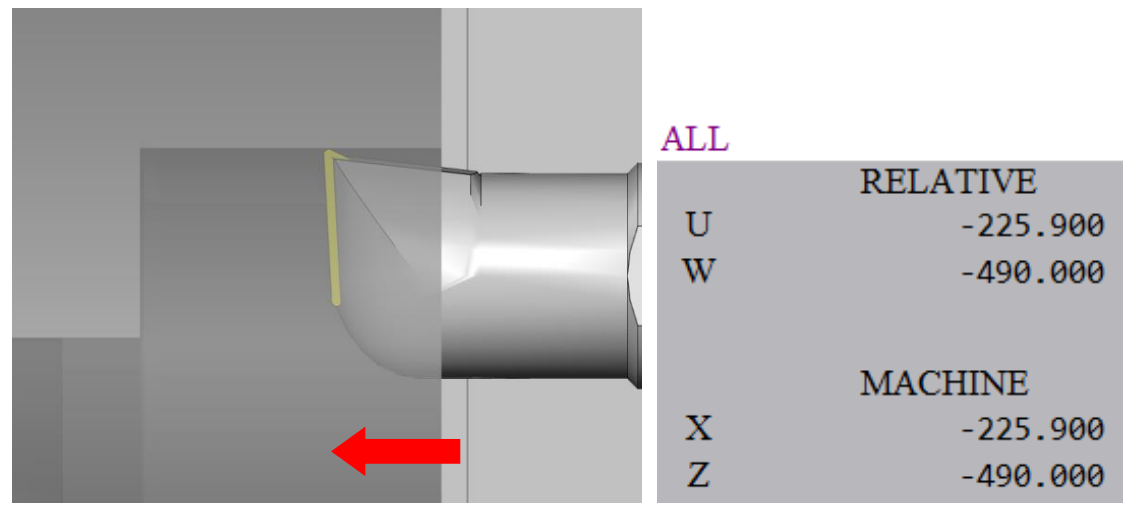
(5) When cutting to the bottom of soft jaws ,
move upward for about 1.0mm to slot corner radius R (Tool nose R=0.4)

(6) Keep cutting downward to (-X) direction till away from the soft jaw
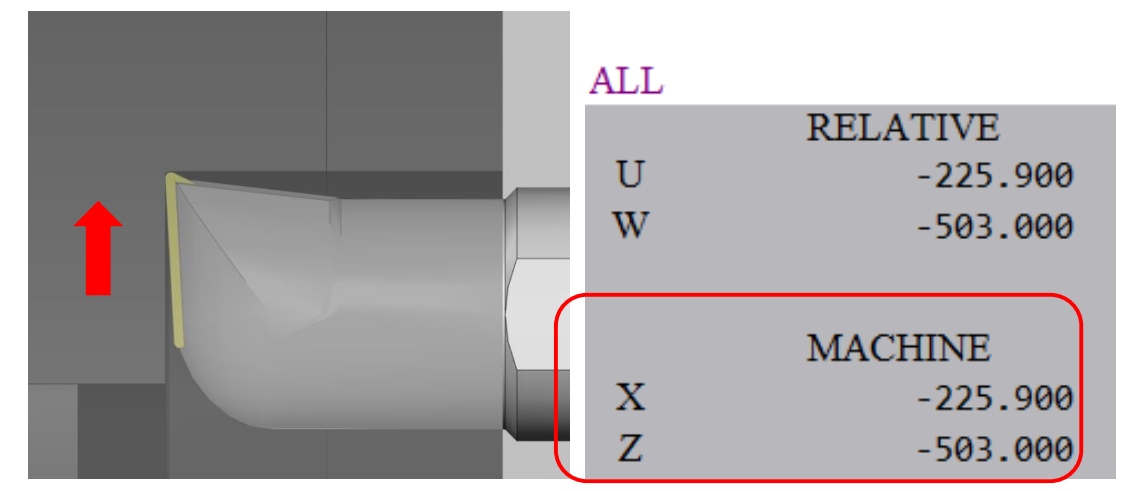
(7) Move tool toward –Z for 0.02mm
(8) Cutting upward to (+X) slotting position

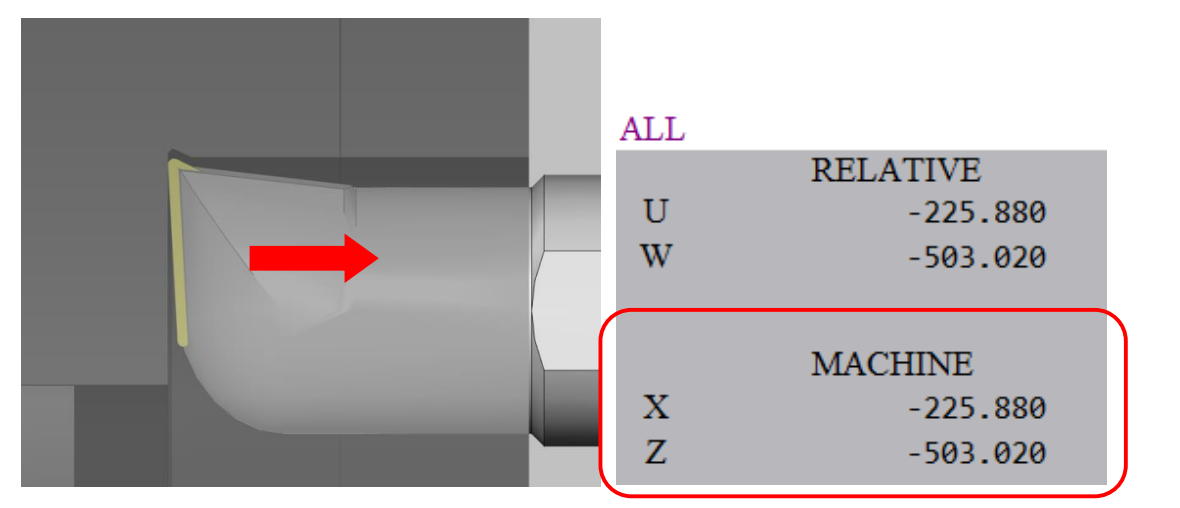
(9) After returning to soft jaw inside diameter for 0.02 mm (Return 0.98mm),
cutting toward +Z direction till reach soft jaw outside diameter end face
(10) Press【Stop】to stop spindle rotation
(11) Press【Next】after finish cutting soft jaw

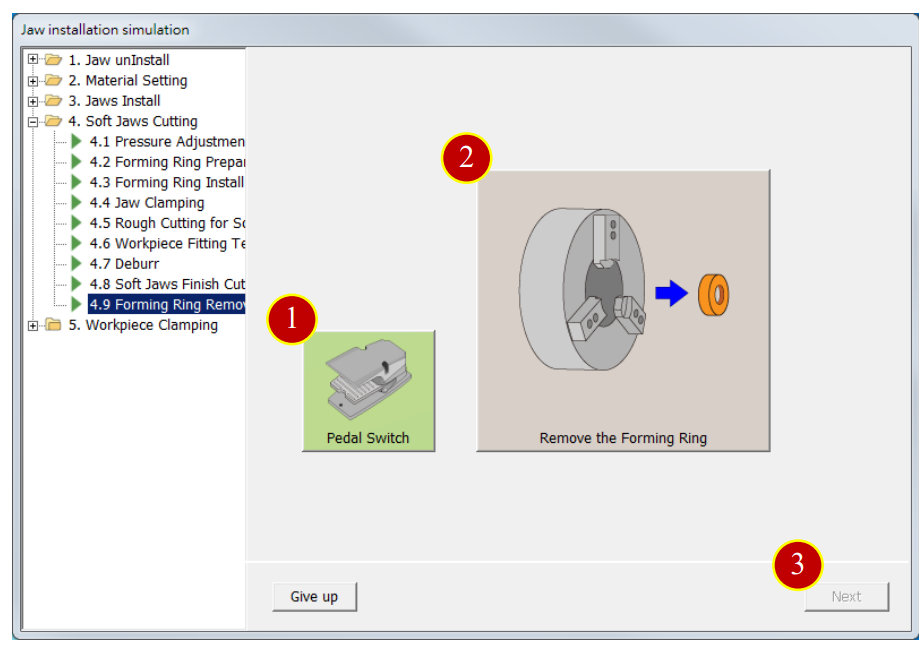
9.4.10 Remove the Forming Ring
(1) Click【Pedal Switch】to open jaw
(2) Click【Remove the Forming Ring】
(3) Click【Next】to enter workpiece clamping steps
9.5 Workpiece Clamping
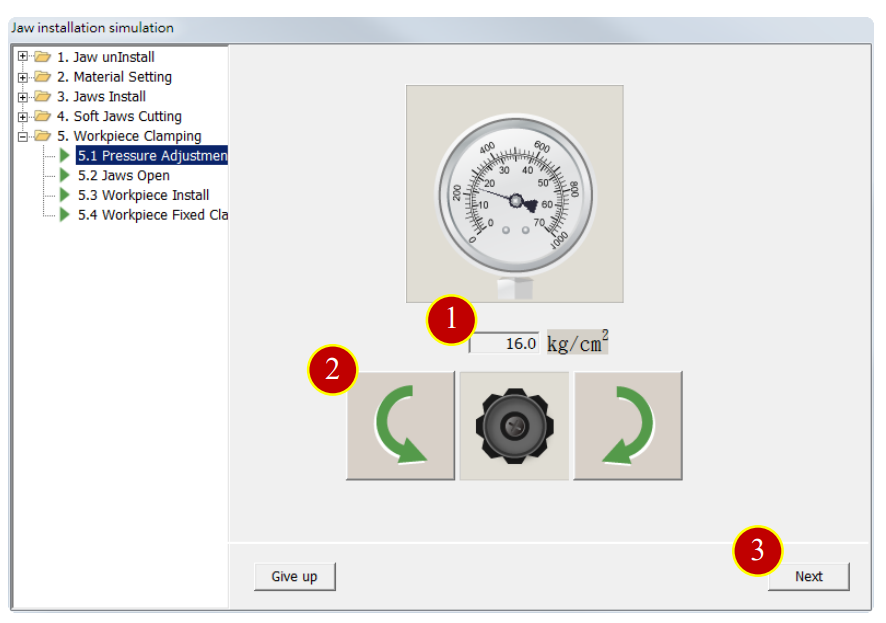
9.5.1 Pressure Adjustment
(1) When clamping workpiece, the pressure adjustment value is between 12-20 kg/ cm2
(2) Click【Pressure Adjustment】button to adjust the pressure e.g. 16.0 kg/cm2
Click left rotation button to decrease pressure, click right rotation to increase pressure
(3) Click【Next】
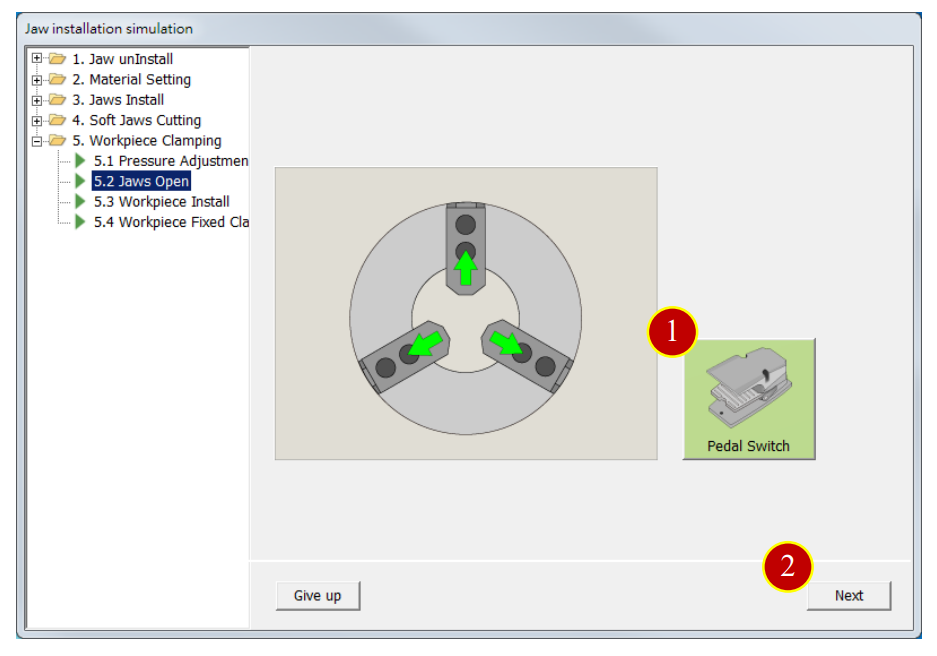
9.5.2 Jaws Open
(1) Check the jaw, if it is close click【Pedal Switch】again to open it.
(2) Click【Next】
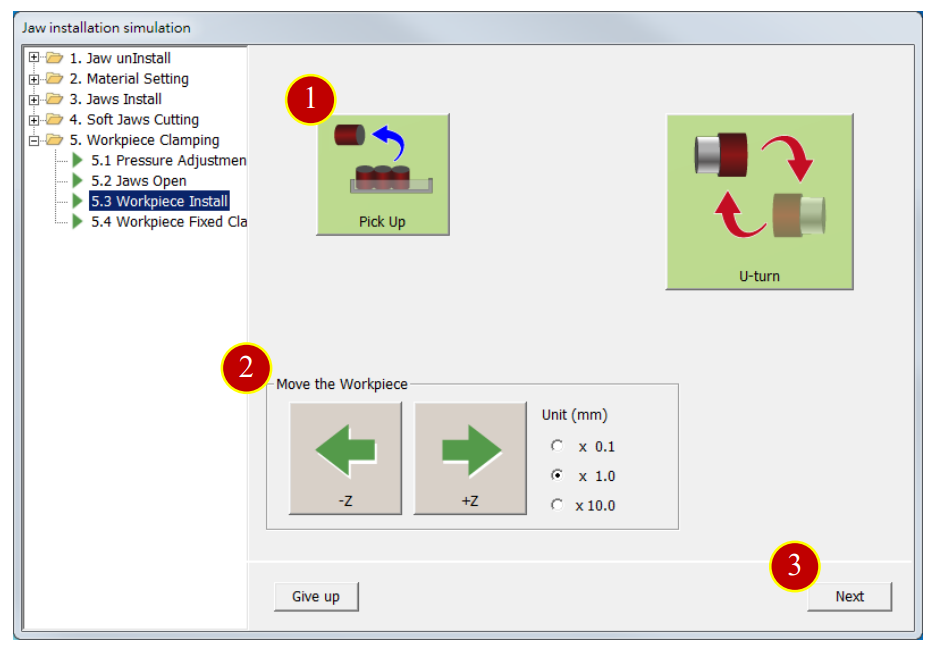
9.5.3 Workpiece Install
(1) Click【Pick Up】
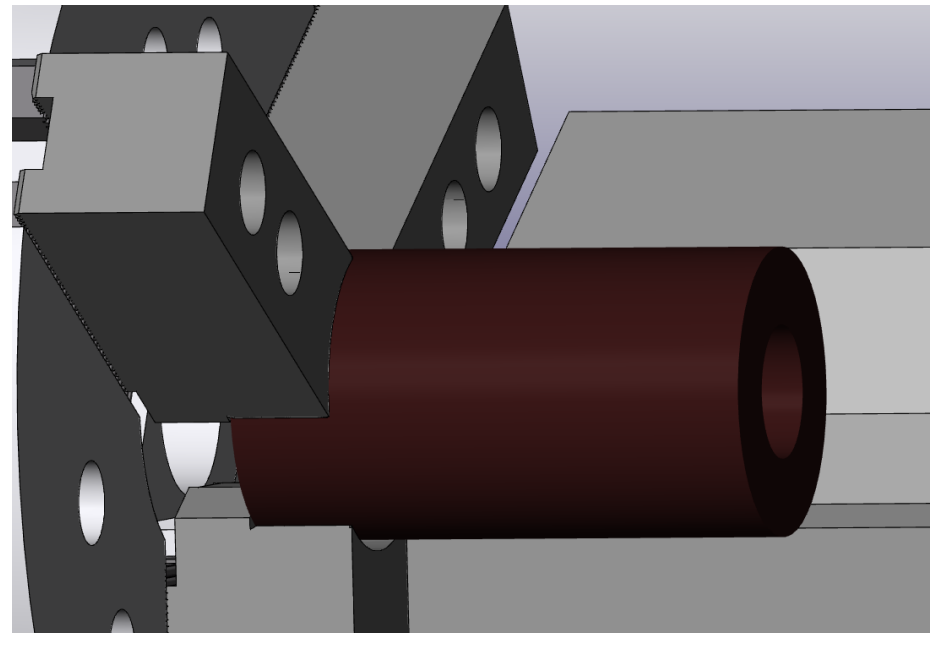
(2) Click【-Z】to move the workpiece above soft jaw
(3) Click【Next】
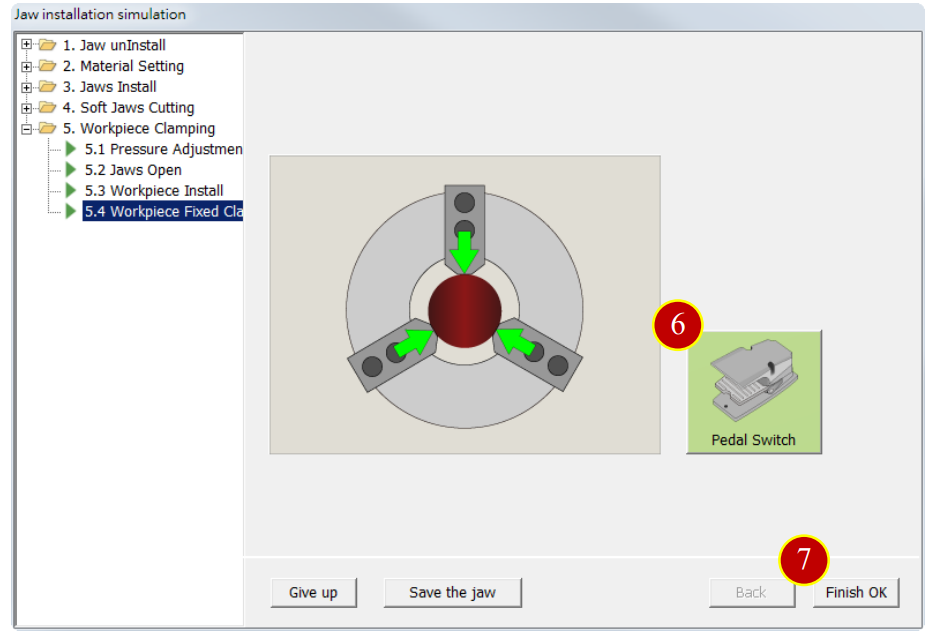
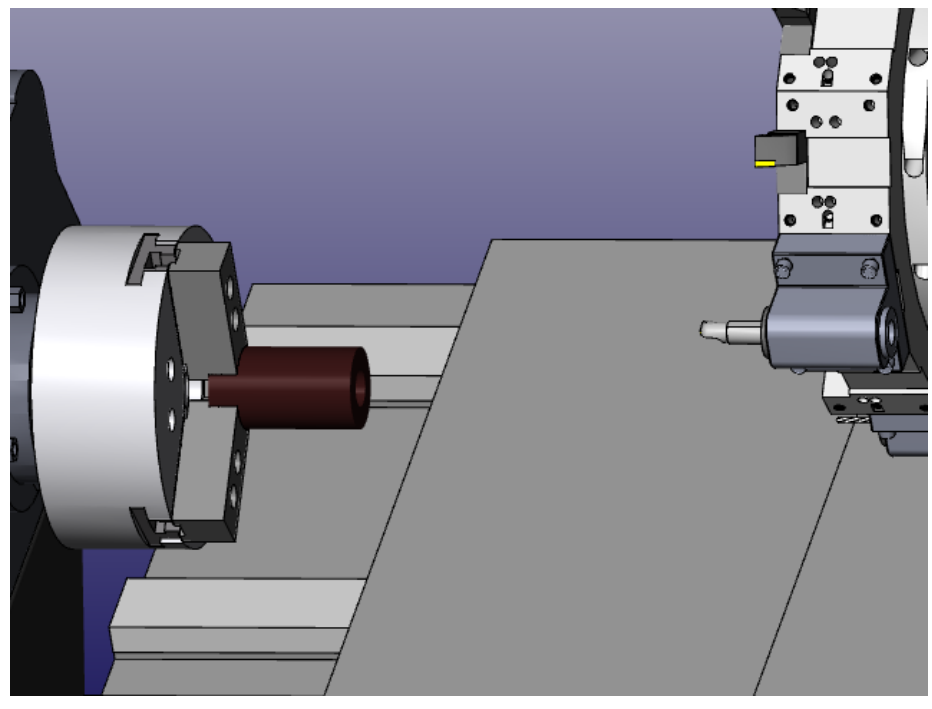
(4) Click【Pedal Switch】to clamp the material tightly
(5) Click【Finish OK】to finish the soft jaw installation
Get free trial now!
1.Register as RenAn member
2.Get free trial_VM Fanuc 0i-TF
3.Contact RenAn for more information: service@renan.com.tw
文章區塊