
CH3_Tool & Material_Heidenhain Milling
today
2025-01-21
local_offer
Heidenhain Milling
visibility
1537
3. Tool & Material
3.1 Material Settings
Set material dimension and choose the fixture.
3.1.1 Cube
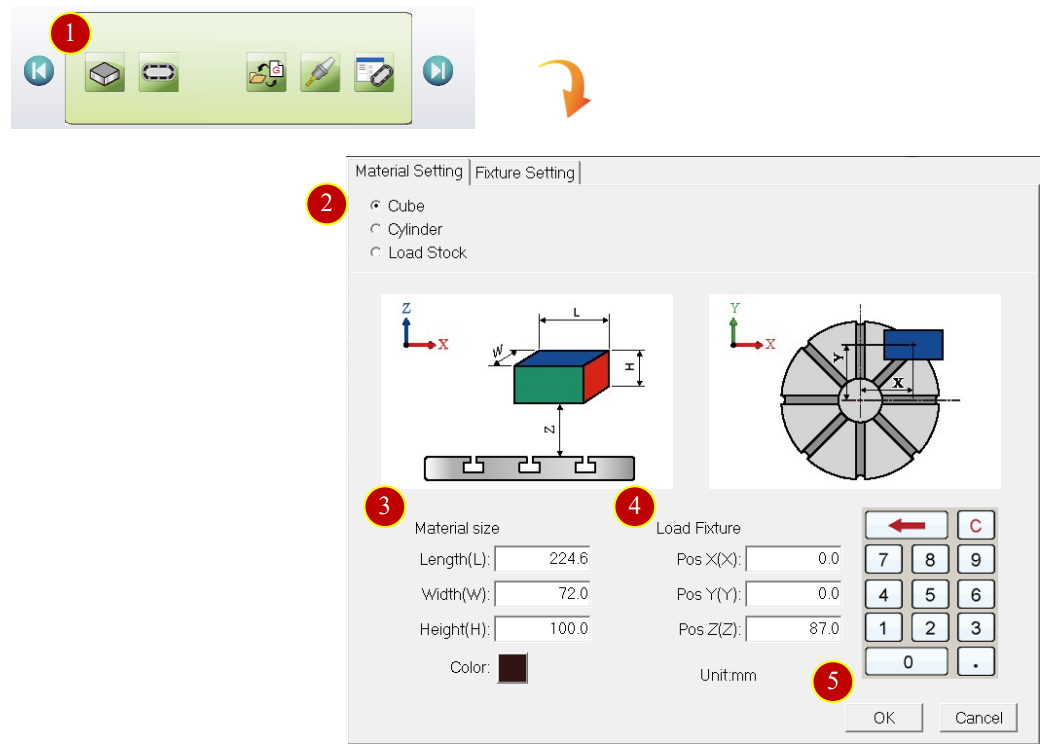
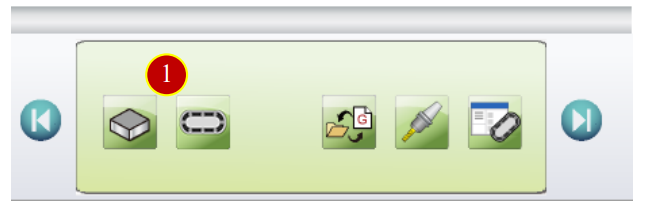
(1) Press [Application Tool bar] > [Material setting] to set material dimension
(2) Press [Cube]
(3) Key in the length, width, height of the material
e.g. Length (L)=224.6, Width (W)= 72, Height (H)=100
(4) Set load fixture
Default: X direction (MX) = 0, Y direction (MY) = 0
(5) After finish setting, Press [OK] to Confirm and Exit

3.1.2 Cylinder
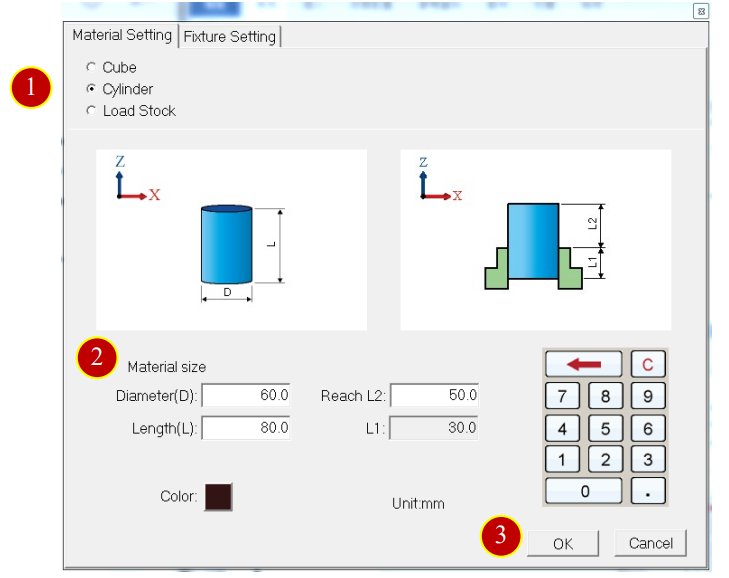
(1) Press [Cylinder]
(2) Key in the diameter, length, reach L2
e.g.: Diameter(D)=60, Length(L1)=80, Reach L2(L2)=50
(3) After setting, press [OK]
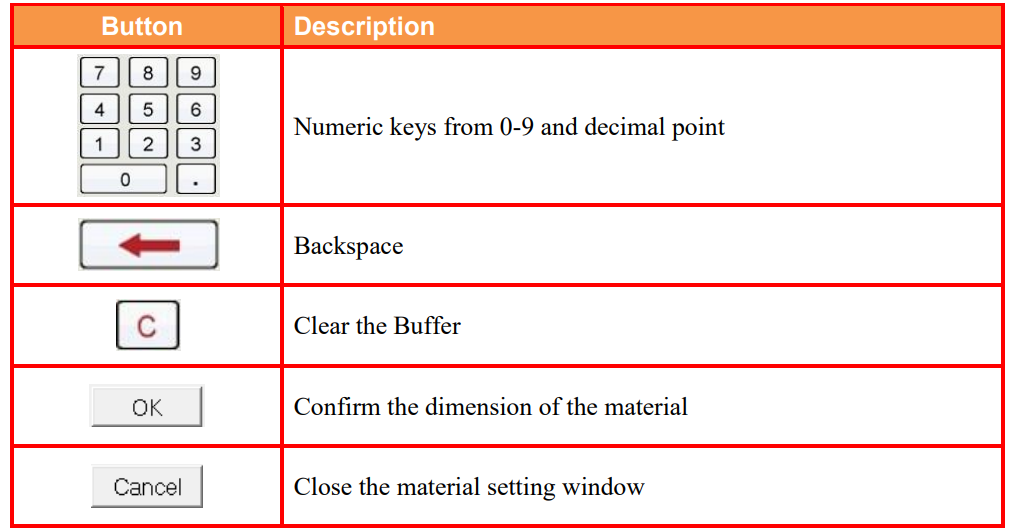
3.1.3 Material Setting Button Description
3.2 Magazine and Tool Install
To install the Tool Magazine on the machine before simulation
3.2.1 Tool Magazine Install Function Description
3.2.2 Install Tool
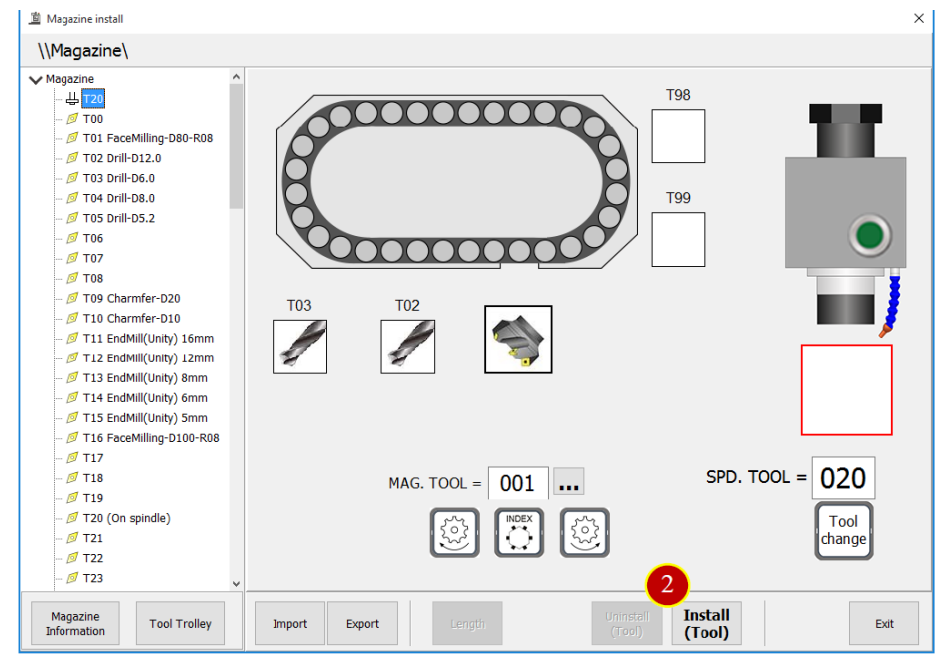
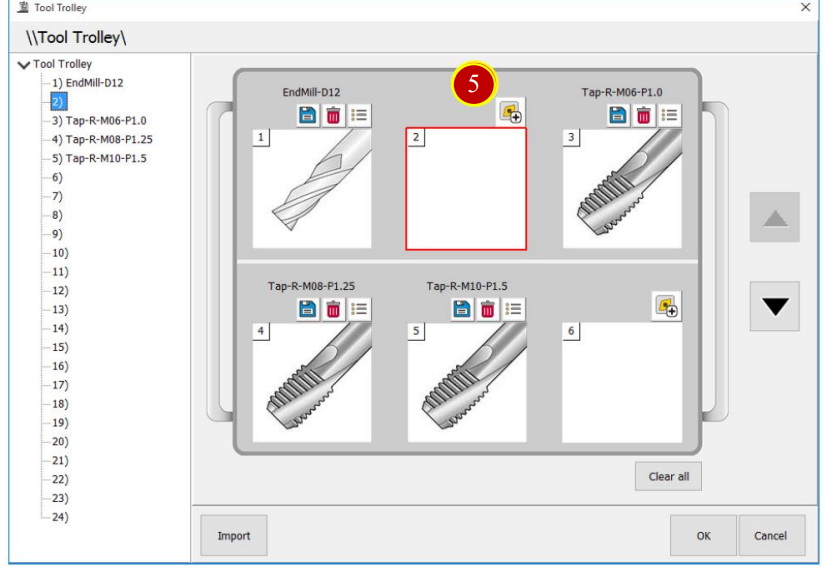
e.g. Install “EndMill-D10” on No.20 tool position
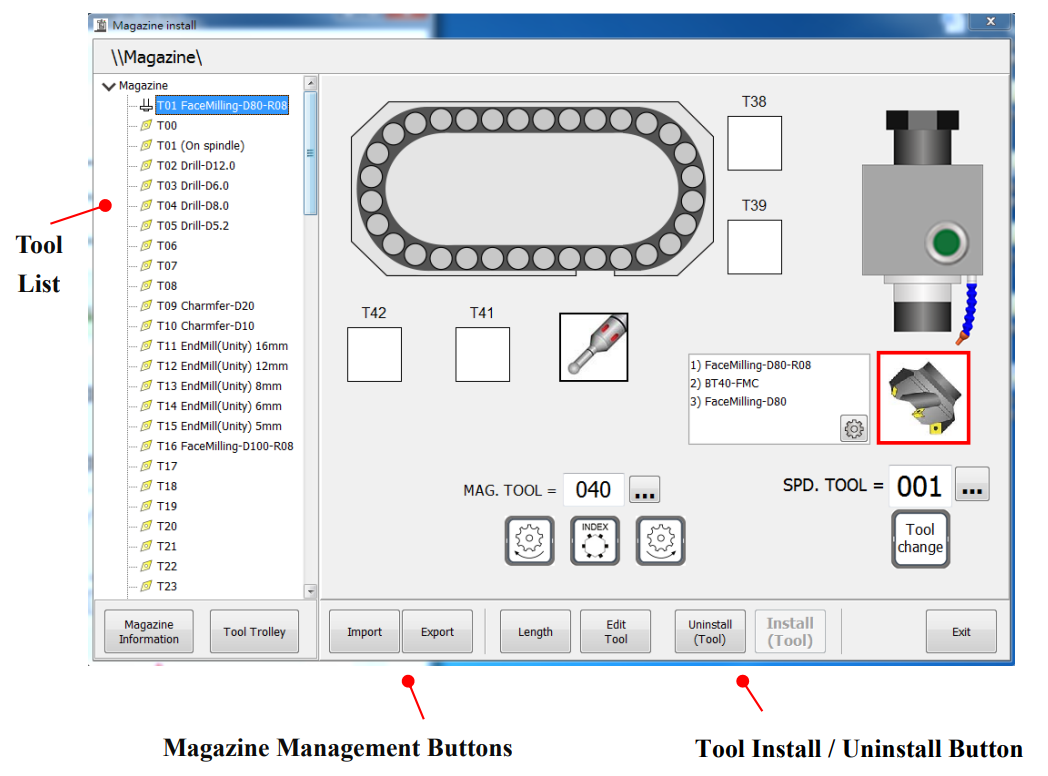
(1) Press [Magazine] to Install Tool Magazine
(2) Press [Install (Tool)] to open Tool Trolley window.
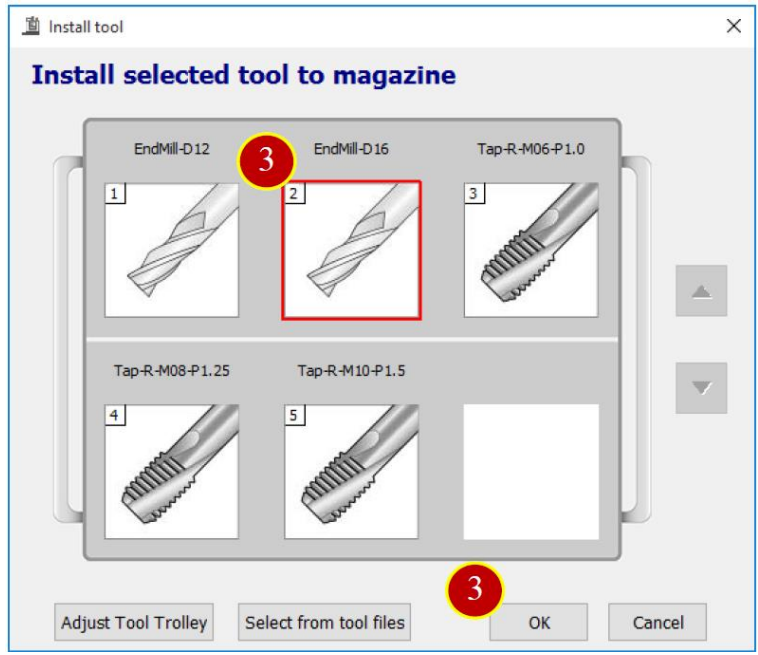
(3) Choose tool, press [OK] to return to Magazine window
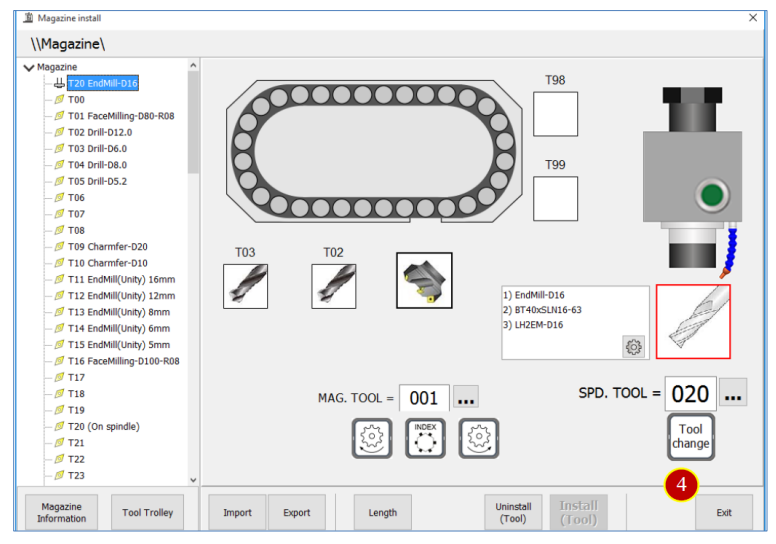
(4) Press [Exit] , the tool installation is finished
(5) Press [ ] to add tool and enter tool select window
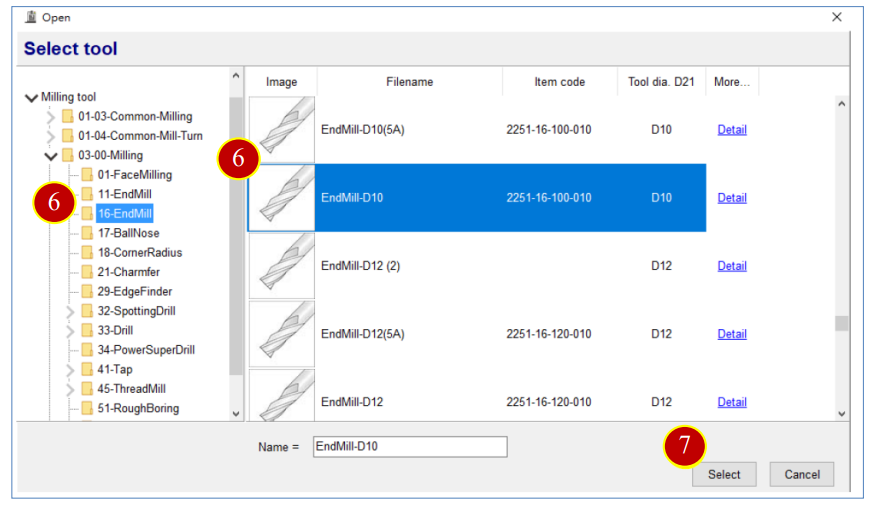
(6) Select the tool in Tools data.
e.g. [03-00-Milling] > [16-EndMill]> [EndMill-D10]
(7) Press [Select] to bring tool back to Tool trolley
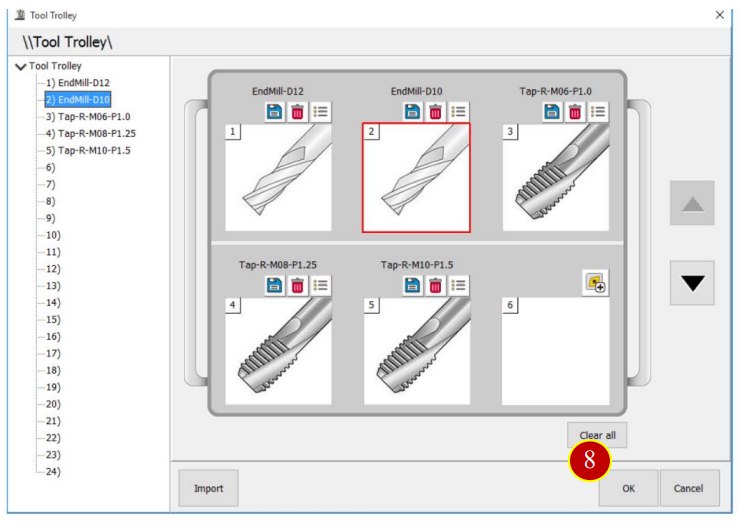
(8) Press [OK] to finish tool trolley adjustment.
3.3 Tool Manager
To set up the tool data includes Tool tag, Holder parameter, Tool parameter,
Process data, Cut condition as the basic data setting before simulation
3.3.1 Enter Tool Setting Function Description:
(1) Press [Application Tool Bar] > [Tool Manager]
(2) After entering Tool Manager window, the button description is down below:
3.3.2 [Tool Manager] Button Description:

3.3.3 New Tool
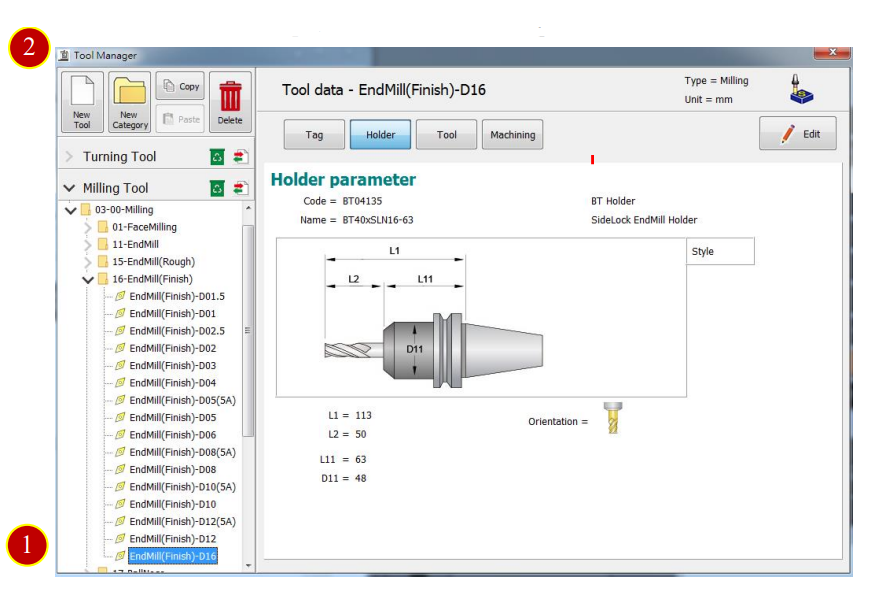
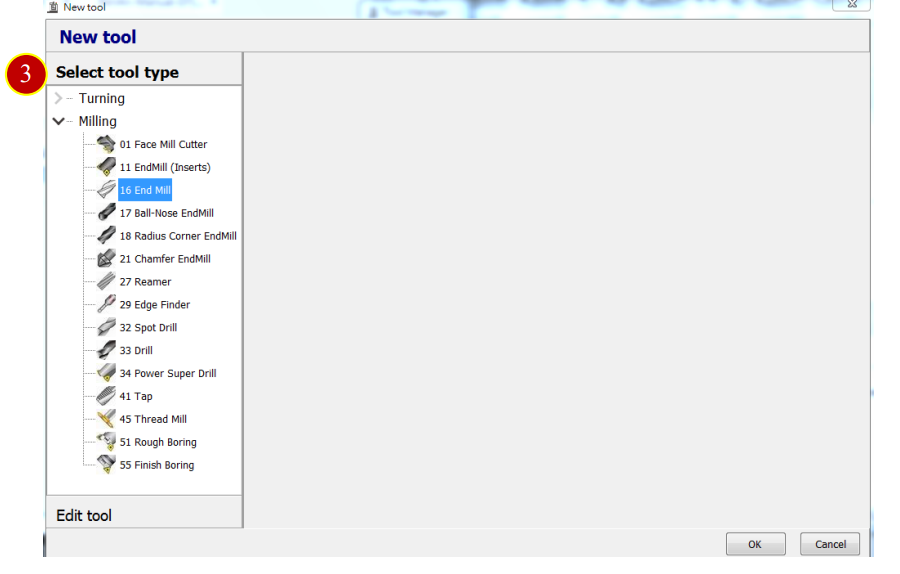
(1) Select tool category in tool list
e.g. [03-00-Milling] > [16-EndMill(Finish)] > [ EndMill(Finish)-D16]
(2) Press [New Tool] to enter New tool window
(3) Press [Select Tool Type] > [Milling] > [16 End Mill] to enter Edit tool page
(4) Key in Name and Item name in Tool tag page
e.g. EndMill(Finish)-D16
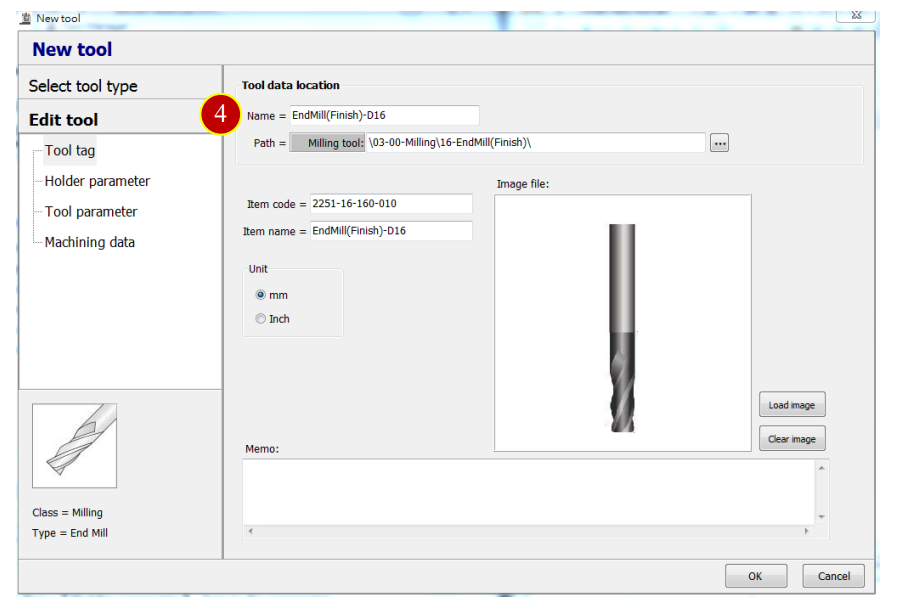
(5) Press [Holder Parameter] of option and key in Holder parameter
e.g. Holder code=BT40xSLN16-63, Holder name=SLN16-B40,
L1=102.36, L2=39.36, L11=63, D11=48
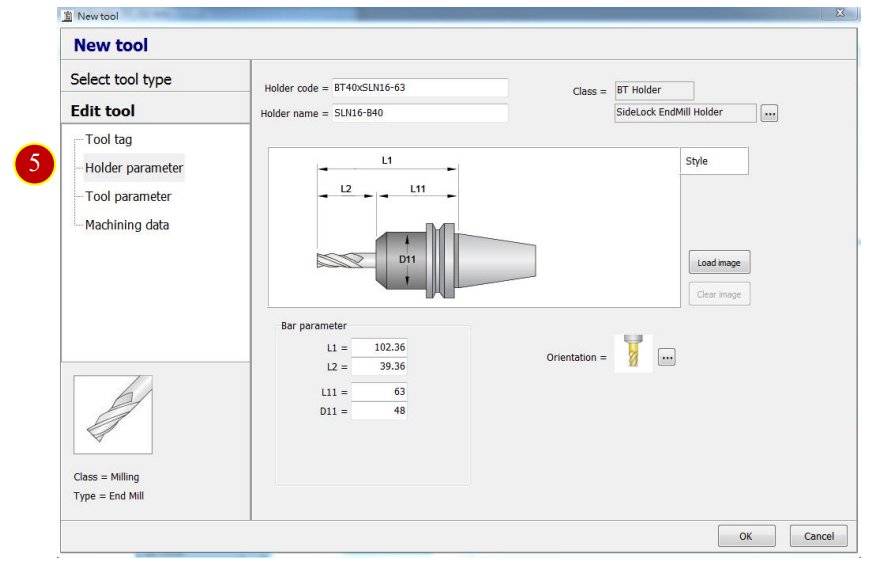
(6) Press [Tool Parameter] of option to key in Tool parameter
e.g. Tool code= MSSHDD1500, Tool name= ENDMILL-D15
D21=15,D22=15,L21=75,L22=35,L25=25, Teeth= 4
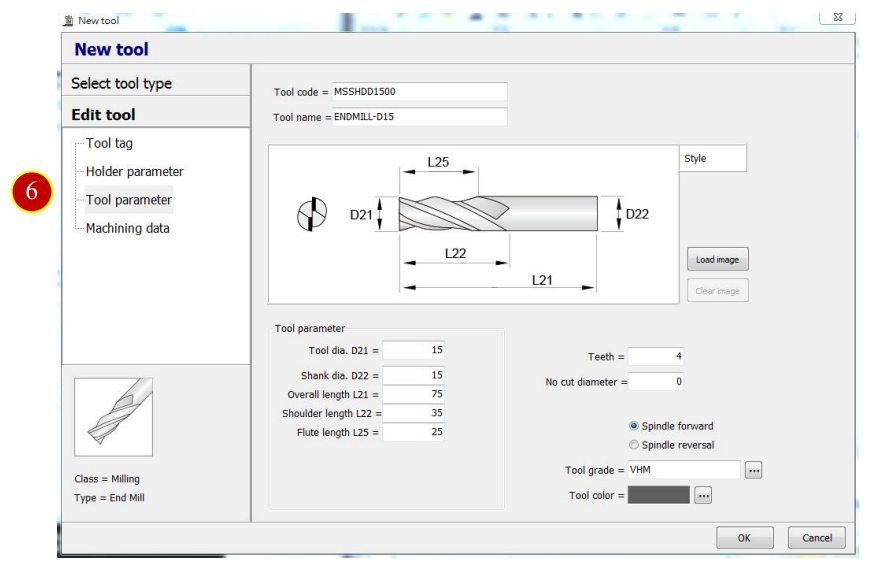
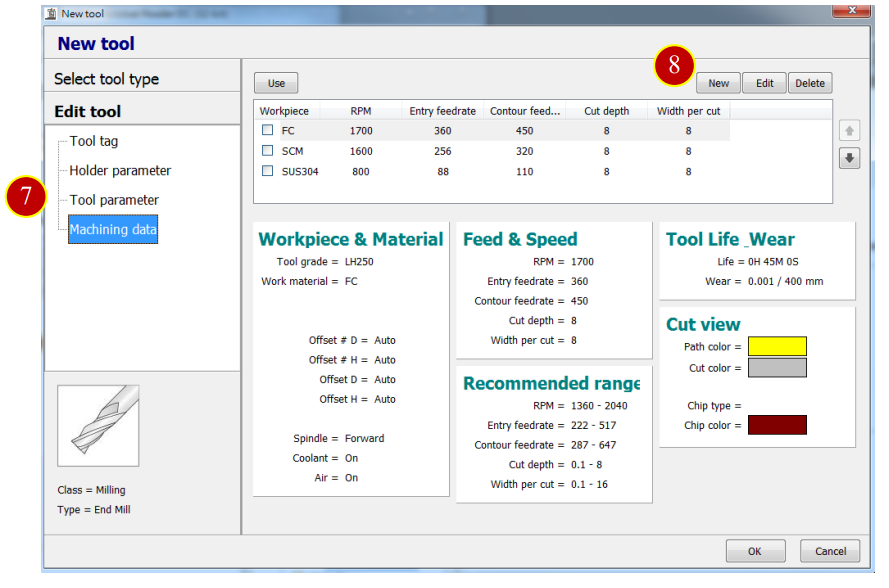
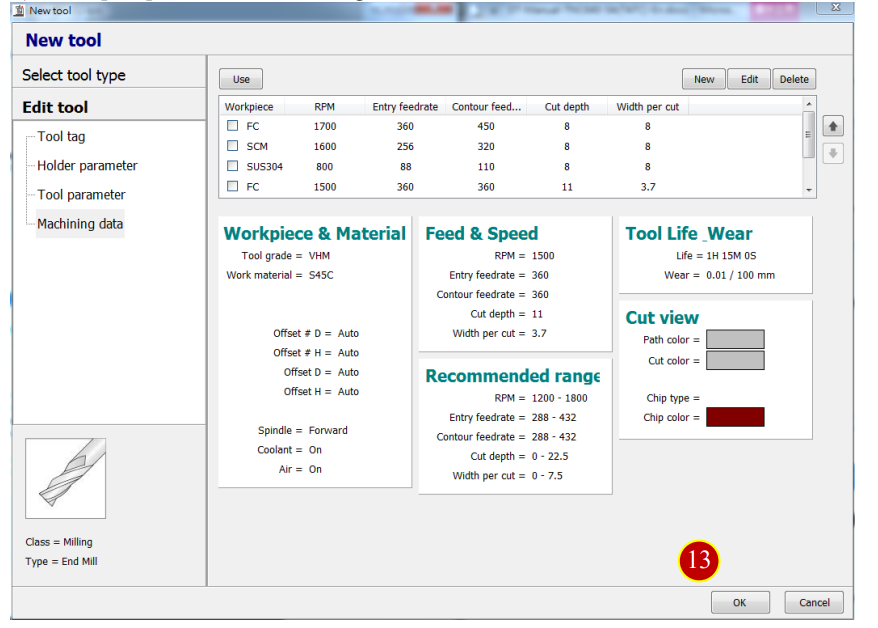
(7) Press [Machining Data] of option to display the Process data
(8) Press [New] to add new Machining data, Workpiece, RPM, Entry feedrate, Cut depth
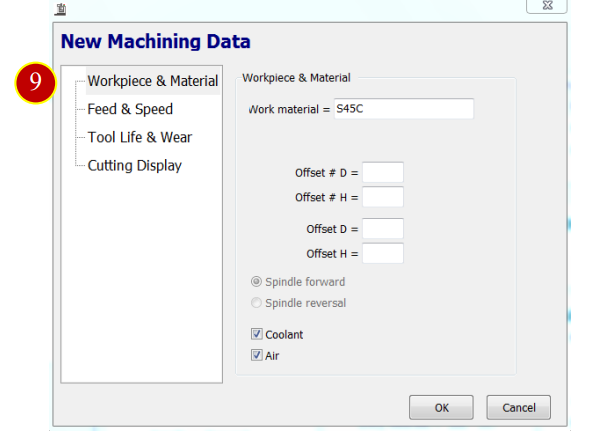
(9) Press [Workpiece & Material] to edit Work material, Offset, Coolant, Spindle forward
e.g. Work Material= S45C
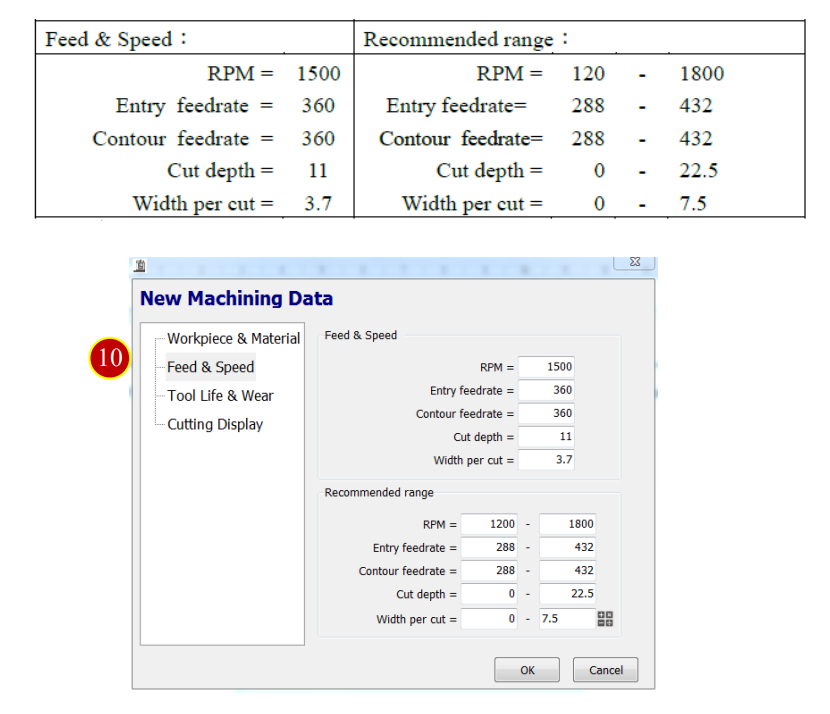
(10) Press [Feed & Speed] to edit Cut condition, Spindle RPM, Feedrate range, Cut depth
e.g. :
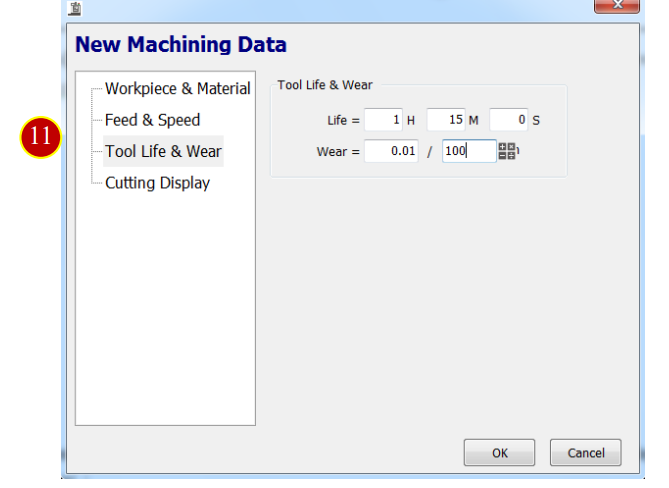
(11) Press [Tool Life & Wear] and key in data
e.g. Life= 1H 15M 0S, Wear= 0.01 / 100
(12) Press [Cutting Display] and select the color

(13) Press [OK] to finish tool setting
文章區塊